Showing posts with label Informational. Show all posts

Baking Pans: Testing Aluminum vs. Non-stick


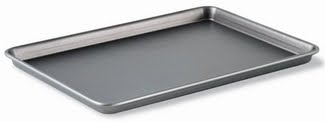
Aluminum jelly roll pan
Equally good for waking up heavy sleepers.
Recently, I started getting into making cookies, determined to improve my chances of putting Felix & Norton out of business. Or failing that, creating something along the lines of edible. All I knew for certain, is that every time I made a batch with baking soda, I could taste the baking soda. And it was about as pleasant as rat poison. But there's plenty of other ways to ruin cookies, including what you bake them on.

It would seem the natural choice is to use a cookie sheet, since the very name implies suitability for the task. Many people refer to a "jelly roll pan" (aka "half sheet", "full sheet" etc.) as a "cookie sheet". But they're not the same. A cookie sheet has low or no sides to promote even baking of cookies, and allow them to slide off easier. A jelly roll pan has raised sides all around.

Alas, I gave my large air-insulated cookie sheet away long ago, because I never baked cookies. So as a replacement, I bought a non-stick heavy duty commercial grade jelly roll pan. I couldn't say no when I saw it, it was staring me in the face and wouldn't look away. It was to be my pan of all trades; cookies, roasting, broiling. Most things I'd do in an oven. From the heft and weight, and the fact that it stated "commercial grade", I convinced myself that I needed this pan, because it would not warp at high heat. Something I always hated about the cheapie baking pans. Well guess what it warped like anything else. However, this is not a good pan to put under high heat anyway. Non-sticks containing PTFE (ie. Teflon) break down over 450F. To be safe, it's probably not a good idea to heat such a pan above 400F. And after super-modding the insulation in my oven, it can easily do 600F on the bake cycle. So I found myself looking for a replacement for the replacement.

I still didn't want to commit myself to just a cookie sheet, and reserve space for yet another tray that I might not use very often. But this time, I decided to stop messing about buying baking pans from a grocery store chain. I went straight to my favourite source for such items: a restaurant supply shop. There I bought a nameless aluminum jelly roll pan. It had no fancy "commercial grade" labels on it. No brand or labels at all in fact. But sitting in a restaurant supply store meant by definition, it was commercial grade. Does that mean it doesn't warp under high temperatures? I'm happy to say, it hasn't yet. Now how does it do cookies?

Brazilian Banana Cookie
vs.
African Banana Cookie
While baking a batch of chocolate banana cookies, I thought it would be interesting to compare this pan with the non-stick version. Using the same cookie batter at the same temperature setting. You can see the results in the adjacent photo, showing the bottoms. The lighter coloured cookie on the left is the aluminum pan; the darker one on the right was baked on the non-stick. The heat was about the same, but I had to leave the cookies baking for much longer (about 6 minutes +) in the aluminum pan. And as you can see, it still didn't come close to the doneness of the nonstick pan! Which is good actually, because the nonstick cooks the bottoms too fast. The result is a dry, hard bottom, that doesn't quite gel with the rest of the cookie. This is why it is always recommended to reduce your cooking temperature by 25 degrees, when you use a dark, non-stick baking pan to make cookies, etc.

Non-stick jelly roll pan.
Named after jazz great, "Jelly Roll Morton".
As for removing them when done, surprisingly, the cookies in the pretense-to-high-quality non-stick baking pan had to be pried off with a hard, thin spatula, and a good bit of force. Despite the fact that this was a relatively new and little-used pan. I used a bit of butter to grease the aluminum pan, and when it came time to pop them off, they slid quite easily. Much more so than the "non-stick". The bottoms were softer, and the cookies themselves flatter. I preferred this version. I should have a Silpat mat somewhere, and this helps to keep cookies from sticking to the tray, without the use of butter. But you can be sure this will change the texture/taste of the bottoms, and silicone.... well I suspect it won't be for the better. Anything that insulates the food from the (direct) source of heat will change the reaction on the surface of the food.

Conclusion: It makes a great difference what you bake your goods on. Mind, a good cook doesn't blame his utensils. Unless it's the fault of the utensils, which it usually is. These things have a mind of their own, I swear. Oh, and I found a solution to not storing a dedicated cookie sheet: turn the aluminum pan upside down.

How To Chop An Onion


J.A. Henckel Twin Friodur
 8" ice-hardened forged
German steel. The finest
letter opener money can buy.
Onions. If they didn't exist already, we'd have to invent them. Otherwise, we would not be able to make most of the dishes we do, as they are a base ingredient common to a great many recipes. So what's the best way to dice an onion? Well, there may not be a "best" way, since there are a number of ways that people can accomplish this. But there are bad ways to chop an onion with a knife. Ways that are less safe, or messy and inefficient. There are even bad knives, that contribute to bad ways of cutting an onion.
Victorinox Forschner
10" serrated chef's knife.
Even cuts Ginsu knives.
To cut an onion safely, you should use a sharp chef's or slicing knife. This helps insure you will cut through the soft layers of the onion, and not just cause them to slip under your fingers, causing you to lose your grip. Or if you're worried about safety, a fine serrated chef or slicing knife is excellent. Even a good serrated tomato knife can do, on occasion. For onions, it is better to use a cheap serrated knife (if you have to), than a cheap plain edge.

There's worse, though. There's mangling an onion, using kitchen fad gadgets, like a "Slap Chop", or a food processor. Not unlike garlic, if you're crushing and slicing an onion at disparate angles (as these gadgets do), you will get unwanted results. You'll end up releasing bitter onion juices, which can have a negative impact on the flavour of what you're using the onion in. In the raw state, you can see and taste the difference if you compare methods of preparation. (Tip: If you are sensitive to onion gases, wear swimming goggles while chopping onions).

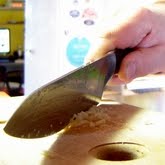
Below, I demonstrate two good methods of dicing an onion in even-sized pieces. The reason for showing two methods is because some may not be comfortable using the method I use (Method #1). Though it shouldn't be a problem, because with your palm resting on the onion, at no point are your fingers in the way of the knife blade. The idea is, once you've cut the onion in half widthways, you create slices across the onion, then cut lengthwise, and the onion will fall into square pieces. (I recommend holding only half the slices at a time, to make things safer).

In Method #2, you do not cut the onion in half widthways. Instead, you create slices across, as in Method #1, but then you stack half the slices up, and chop that into dice. (I'm not sure this is any safer, because the stacks can shift as you are slicing them).


1. Start by slicing onion in half
 lengthways. (Showing is the
root end). 
2. Keeping knuckles resting
against the side of the blade,
with the tips of your fingers
curled inwards, cut off the
root end.

3. Showing root end cut off.
4. In the same way, cut off
the opposite end. 

5. Showing opposite end cut off.
6. Peel off the skin.

7. Chopping Method #1:
With palm resting firmly on
top of the onion, slice in half
widthwise. Start slicing the
onion with the tip of your knife.
You should arrive near the blade
of the knife when finished.
8. Slice across the onion,
approx. 1/4" slices.

9. Showing first crossways slice
10. Showing onion sliced crossways.
(To dice using Method #1, cut
across the length of half the slices.
Repeat for the other half).

11. Chopping Method #2:
Skip Step #7, go straight to
Step #8. Stack half the slices
from Step #10 (as shown).
12. Slice across the top of the
stack to create a dice.

13. Showing one quarter of the
onion diced into squares.
14. Dicing the other half of
the onon. Remember to keep
your knuckles against the side
of the blade, and fingers curled in.
15. Showing the onion
fully diced. 

How To Chop Garlic


Many of the recipes here, and in general, call for chopped garlic. For very good reasons at that. Garlic (often along with onion) helps flavor oil. This permeates through what you cook later in the oil. Garlic, especially raw, has many healthy benefits. It boosts the body’s production of a compound that relaxes blood vessels, increases blood flow, and prevents blood clots and oxidative damage. But many don't prepare garlic ideally, and that can have a great effect on the taste of the dish you're preparing. For example, use a food processor and you're chopping garlic in randomly-sized bits, at random angles. All of which will create a much more bitter flavor than using the method shown here, to mince it. A garlic press is at least an improvement, but put down your Zyliss. Because even the best garlic press will not give the same results as a simple chef's knife (or cleaver). Nor will it be as easy to clean.

Apart from the fact that you can't push all of the clove through the holes of a press (leaving behind the outer layers of the clove), what does come through is not crushed nor chopped in the same way as a flat blade would do. Neither the garlic pulp nor its oils produce the same texture or taste. The pulp produced by a press is a bit more watery and leaning toward bitter. The pulp produced by the chef's knife method is stickier and more mellow. The more mellow flavor of the "oil" from the knife method is superior in taste and nutrition. Since the garlic flavours other ingredients, that difference in taste can have a significant influence on the dish in general. Don't believe me? Process a clove of garlic through a press, than using the method I show below; then taste each. You'll see and taste a difference.

1. Cut the root end off, keeping
knuckles close to the blade.
2. With your palm on the flat side of
the blade, crush down with force,
to loosen the papery skin of the clove.

 3. You have now loosened the
papery skin on the clove.
4. Grab the tip opposite the root
end, and wriggle the paper free.

5. Sprinkle a generous amount
of salt on the clove (reduce
salt in recipe by as much).
6. Crush the clove again with force,
using the flat side of your blade.

7. Wriggle the blade of the knife
side to side, while pressing
down hard with the palm of
your hand to crush the
garlic well.
8. This is what it looks like
after it's been crushed.

9. Chop the garlic into
fine pieces, in both
directions. 
10. Smear and spread the garlic
pulp back and forth against the
cutting board, with the side of
your chef's knife, to flatten and
mash it down further.

11. This is what it looks like
after being fully chopped
and mashed.
12. Scoop the garlic on to the
side of your knife, to aid in
adding it to your recipe.


The Recipeless Cook © 2008 | Créditos: Templates Novo Blogger