Showing posts with label Recipeless. Show all posts

Bánh mì (Vietnamese Fried Egg Sandwich)


"Eat quick, before more vegetables escape!"

The bánh mì (pronounced "bun me!") sandwich is Viet Nam's answer to the Subway chain. Actually, it dates back to the 40's, and the influence of Viet Nam's French colonialists, among others, is clearly seen in this dish. The sandwich can be found in hawker stalls all over the streets of Viet Nam. It's popularity has seen it spread to Western countries as well, who often don't make it to code. The bánh mì  is normally a meat-filled sandwich, and the meat usually revolves around twenty thousand variations of pork. I'm porky enough as it is, so I'm not about to pork things up any further. This variation, with eggs, would be more considered a breakfast bánh mì. But unless you're planning on plowing the fields yourself because the ox have taken ill, this would be considered a pretty heavy breakfast. I made it for supper, instead.

Another way I did not follow tradition, is by using an Italian ciabatta bread for the base. It is chewy and flavorful, with a soft crust. The opposite of a vietnamese baguette, which is drier and has a thin crispy crust. I did so because it had simple ingredients, without the usual fillers and junk the local French versions carry. To more closely follow the bánh mì, you'll want a nice, large, short, fat, French baguette. Which more closely resembles the Viet Namese baguette. (The viet namese baguette is actually made of a combination of rice and wheat flours, and may or may not be found at asian shops in your area). 


Ingredients

crusty (ie. French) bread (short baguette)
2 eggs
carrots
celery
cucumber
coriander (cilantro), fresh (not chopped)
mayonnaise
salt, pepper

Vinaigrette

soy sauce (or Maggi sauce)
rice vinegar
sesame oil
chili oil

Julienne (or shred) the vegetables. Toss the vegetables in a large bowl, and sprinkle over top with the various vinaigrette ingredients (in the quantities you desire for each ingredient). Mix.  In a non stick pan, fry the eggs sunny side up until they are crisp around the edges (I prefer to turn them over at the end of cooking and fry a minute or two, to set the yolk). (n.b. You can add onions here, if you like. Also, I sprinkled my eggs with a bit of soy sauce and sesame oil). Remove. Cut the baguette in half (ensuring you do not cut too close to the bottom). Spread mayonnaise on the bottom half. Then the vegetables, then eggs, top with cilantro. Season with salt and pepper, if desired.

"Waiter! More napkins please!"
Vary the vegetables, if you like. Green peppers can be added, or more exotic ingredients like daikon or jikama, if you can find it (or store purchased pickled vegetables). The eggs can be scrambled or omelet-style if you prefer.  They can be substituted entirely for fried tofu or seitan. The acid can be red wine vinegar, if you don't have rice vinegar, or prefer otherwise. The soy sauce can be Maggi-brand sauce. I used chili oil, because that's all I had that would work. But the hot stuff can be anything hot (particularly asian) that can be mixed or better still, spread on the bun. Sriracha or garlic-chili sauce would work well, for example. You can also add in some cold rice vermicelli noodles. Finally, you can drizzle the vinaigrette ingredients on the bun directly, as many "banh miers" do, instead of mixing it with the vegetables.

The one thing I would maintain is the coriander. Without the fresh coriander, it's just a submarine sandwich!

Broccoli & Cheese Potage


It's a lazy summer afternoon.... no, it's a busy summer night. You don't have the time, the ingredients, or the inclination to make anything too fancy or involved. But you want to eat healthy. You want a potage. Which in my view, is a creamed vegetable soup. It doesn't have to be thick as porridge. In fact I don't try to make it too thick here. I made mine medium, with a bit of body, and a consistency about that of somewhat thin applesauce. But it should have good, healthy ingredients. You keep all the vegetables in the pot, so the soup retains their nutrients. This recipe is both quick and easy to make; all you basically need is an appropriate vegetable. I had a broccoli that needed eating, so it's a broccoli potage. If you just have a cauliflower, make it a cauliflower potage. It could be cabbage, could be a squash. Zucchini might work. I add cheese and herbs for flavour, because it would be bland without it. The cheese I chose for this soup was "Oka" type; one of the stinkiest cheeses ever made, I think. Fortunately, it doesn't taste like it smells. If you want a richer meal, you can add cooked chicken, after processing the soup at the end.

Ingredients

8 c cold water (or chicken broth)
1 broccoli (including stems)
1 lg onion, chopped
2 cl garlic (opt)
1 T powdered chicken stock (if not using chicken broth)
1/2 t mint
1 t dill
Cheese, to taste (recommend fine soft cheese; ie. Oka, blue cheese, swiss, camembert. Could also be orange cheddar, brick, etc.)
2 potatoes, diced (about 1 cm)
salt and pepper, as necessary

Instructions

Cut the broccoli florets from the stalk (wash in cold water). Cut about 1/2" off the bottom of the stalk. Peel the remaining stalk to remove the thick outer layer of skin (with a paring knife, you can peel it like a banana, if you start at the bottom of the stalks). Cut the skinned stalks into about 1" pieces. In a large soup pot (preferably enamelled cast iron), sauté the chopped onion and garlic at a low-med heat, until softened, but barely browned. Add the diced potatoes, sauté for a bit, then add the broccoli florets and stalk pieces. Sauté a minute or two, then add the cold water or chicken stock. Let the water come to a boil on high heat. Add the powdered chicken bouillon (if you started with cold water). Reduce the heat to medium; or whatever is enough to maintain a strong simmer. Simmer uncovered until the water has reduced by about anywhere from 2/3 (recommended) to 1/2; depending on how thick you prefer. At this point, the vegetables should no longer be hidden under the water, they'll be closer to the surface. This could be about 30 minutes or so of simmering. Once the soup has reduced enough, remove it from the heat. Add the cheese, stir with a spoon.

Insert a hand blender into the pot (or pour into a regular blender or food processor), and blend until the vegetables are homogenous and no large bits remain. You can also blend until some large bits remain, if you wish to have more textures (at the expense of a bit of flavor). Add the dried mint and dried dill (or fresh dill/mint is better, if you have it. Use 3x more if using fresh). Also, sprinkle a bit of pepper, if desired. Check if it needs salt, but careful not to oversalt if you're using powdered stock and salty cheese. Stir and serve with good, crusty, artisan made bread; such as one of the no-knead recipes.

Fast And Easy Chicken Biryani


Chicken Biryani is India's answer to the Spanish paella. It is a traditional Indian dish of one part rice and parts meat, vegetable and or fruit and nuts; often made before a wedding, and cooked in an oven. Made well, it is truly a stunning feast of a dish. This recipe is nothing like that. This simple stovetop variation does not try to follow tradition, or make a grand affair out of the meal. This one's only about getting a tasty supper on the table, lickety split. For me, the entire dish, from concept to plating, took about an hour. One half hour to soak the rice (meanwhile, the chicken marinade was being prepared), and about a half hour to cook. Plus, it's (almost) a one-pot dinner. At the end, you get a tasty biryani dish with fluffy, separate grains of tinted rice, and moist, flavorful, tender pieces of chicken and onion. How can you not love that? Most biryani recipes call for a gazillion different spices. I cheated and just used a commercial paste


Ingredients

1 c basmati rice
about half a pound or more chicken breast, fresh or frozen (or alternative)
plain yogurt
1 or more onions
A few tablespoons of ghee, butter or olive oil
biryani spice mix (or alternative)
ginger-garlic paste (or fresh garlic & ginger)
saffron (optional)
bay leaf (optional)
turmeric (optional)


Instructions
 

Soak the basmati rice in a large bowl of cold water for half an hour (after which, you drain and rinse it a few times under cold water, until the water is clear). While it's soaking, you can prepare the rest. I used a couple of small frozen chicken breasts for this dish, which I thawed out in the microwave oven. This little convenience really helped in getting a biryani on the table in about an hour, without preparing anything in advance. If you have fresh chicken breast on hand, even better. If you want to get fancier, and use other cuts of chicken (bone in or boneless), or even other cuts of meat (ie. beef), you can do that also. But you may need to alter the cooking times, or the method. Make sure the pieces are cut not too large.

While the rice is soaking, defrost and rinse the chicken breast if necessary, and cut into about 1" cubes. Toss the cubes into a bowl, along with a few tablespoons of plain natural yogurt, about 1 teaspoon to 1 tablespoon of ginger-garlic paste (I used 1 tablespoon), and spices. I recommend a commercial spice paste, such as a biryani or curry paste from "Patak's" or "Mother's". You may need some salt, depending on what you use for spice. I used about a tablespoon of "Mother's" biryani paste, which is a salty spice paste. So no additional salt was needed. (Taste your paste to see how salty it is. Remember it will be diluted by the yogurt, so its okay if its very salty).

 If you don't have or don't wish to get a paste, you can also get a pre-made commercial biryani spice mix in powder form, such as from "Shan" (which comes in a box). If these aren't available to you, use a curry powder. You can also opt to throw in a few additional Indian spices, if you have them on hand. For example, I added about a teaspoon of turmeric powder to my chicken mixture, a bay leaf, and some dried mint.  Other spices to add here may be; cinammon, ground cardamom, black pepper, chili powder, or cloves (remember to remove them later!). Keep in mind the various heat and spice levels, relative to the amount of meat and yogurt you are using, if you are adding spices in addition to a spice paste or powder mix. You may not wish to have it too spicy or too hot. If you have some on hand, you might also try adding a half or full small can of tomato paste to the mixture. Or even a fresh, chopped tomato.

Chop the onion in med. size chunks, and add to the bowl, along with the chicken, yogurt, spices and herbs, if using. Cover your bowl and let this marinade in the fridge, while the rice is soaking. Of course the longer it marinades, the better the flavour. But as this is the speedy version, I only let it marinade until the rice had finished soaking, about 20 minutes. Bring a medium pot of water to boil, large enough to contain the rice. Once boiling, add about a tablespoon of salt and some olive oil to the water. When the rice has finished soaking, drain it and add it to the pot of boiling water. Boil the rice until it is half cooked; about 5 minutes (test it by crushing a grain between your fingers. It should mush down, without being completely mushy, and should leave a harder core).

While the rice is cooking, you can start the chicken. Place a medium sized pot, preferably a medium dutch oven, on medium-high heat. To which, add a tablespoon or two of (in order of preference); ghee, butter or olive oil. (n.b. You can clarify butter to obtain ghee. Just heat it on low power in the microwave, the milk will separate from the yellow solid. Pour through a strainer, or straight into a jar, to separate and discard the milk part, retaining the yellow part). Once starting to heat, swirl the butter or olive oil until it covers the entire bottom and part of the side of the pot, near the bottom.  At this point, you can add some saffron threads, to give a nice colour and flavour to the meat. Now, add the chicken yogurt mixture that you marinated. (IMO, there is no need to wait until the oil has heated, and you're better off not doing that, to avoid sticking). Flatten down the chicken so it covers the entire bottom. Add the drained rice on top of this, and flatten it down, somewhat.

Optional but preferable, you can add some saffron liquid to the rice. This will flavour and perfume the rice, adding a gorgeous yellow or orange color. To do this, heat about an eigth of a cup of water in the microwave (or use hot tap water). To the water, add some saffron threads, and some olive oil. Mix. Pour in a swirl fashion over top of the rice. Now, cover the pot with a heavy lid. If you do not have a heavy lid, then soak a cotton kitchen tea towel with hot water, drain well, and place this over top of the pot (make sure none of it touces the stove element). Place the cover over, to form a tight seal.

Cook the biryani mixture no more than five minutes total on med. high, just to get things started. Then reduce heat to med. (about 5 or 6 on most stovetop dials). Cook on med about 5-7 minutes. Reduce to low (or about 2 on most stovetop dials), and cook out the remaining time of about 17 minutes on (almost) low.

Serve with a salad, or coleslaw, or some raw cut vegetables. You can garnish with coriander, and serve bread (preferably an Indian bread) alongside.

Coconut Lentil Soup


This is a quick and delicious alternative to the more common dal, or Indian lentil soups. A key difference is the use of coconut milk, as part of the "stock". You can go wild, recipeless style, on this soup. For example, the flavour of the stock can be vegetarian, if you prefer instead of chicken. Or, you can forego the stock altogether, as the coconut milk adds some flavour of its own. Be careful not to bring the soup to full boil, and to simmer it gently after that, to help preseve that delicate flavour. This goes for most soups, actually.

You can also change the spices, depending on what you have on hand, or favour. I had some Rasam powder (a fragrant red curry powder).  So I used that, as a change from curry powder (which itself, is optional in this soup!). Rasam spice mix powder is used to make Rasam, a South Indian soup that typically uses tamarind, and may feature lentils or vegetables. Whatever you choose to spice the soup, make sure you aren't adding more spiciness than you can tolerate. This can easily happen if you're using a prepared curry powder you are not familiar with (Of course, if  you find you've made it too spicy, do not add any black pepper!).


Ingredients

1 large onion, finely chopped
red chili pepper or similar, finely minced (I used dried bell peppers); to taste
piece of peeled ginger, coarsely chopped
2 cl garlic
1 cup red lentils, washed and rinsed
1 can coconut milk
3 cups water
1 tsp chicken bouillon
1 tsp ground turmeric
1 tsp paprika
1 tsp curry powder (I used "Rasam" type curry powder, "MTR" brand)
salt and pepper, to taste
juice of 1 lemon
1 T vegetable oil

Heat the oil in a large saucepan.  Add onion, garlic, ginger. Cover and heat on slow med. heat, until soft, but not browned. Add the lentils, peppers and spices. Mix. Add coconut milk, water, chicken bouillon. Bring to boil, simmer for about 40 minutes, until the lentils are very soft and mushy. Remove from heat and add lemon juice. Garnish with fresh coriander, if desired.

Cold Sesame Noodles


Here's a perfect meal for around this time of year. Thanks to the good folks that brought you global warming®, we seem to be having a scorcher of a spring, and I'm sure summer will be hell next to the fireplace, in comparison. That's the time when you want to bring out a nice bowl of cold (or warmish) sesame noodles. Very simple and quick to make.

Ingredients


Sauce:
1 T smooth peanut butter
1 T Chinese sesame paste or tahini (or simply another tablespoon of peanut butter)
2 1/2 T sesame oil
1 to 2 T sesame seeds (optional)
2 T soy sauce (preferably mushroom flavoured, but could be Bragg's or anything you prefer)
1/4 c water or chicken stock (optional, add last)
1 to 2 cloves garlic
2 t minced ginger
2 t rice vinegar
1 t sugar
1/4 to 1/2 t asian chili paste (could sub red pepper flakes, tabasco or your favorite hot stuff)
1 bunch green onions, chopped

250g (1/2 lb.) yet-ca mein noodles (a straight asian egg noodle, standard fare for this dish. if not available, could sub soba-type noodles, fettuccini-type rice stick noodles or even spaghetti)

In a large pot of boiling water, boil the yet-ca mein noodles for 7 to 10 minutes. Drain, rinse noodles well under cold water, shake out excess water and spread in colander to help them dry while the rest is being prepared.

While the noodles are cooking, toast the sesame seeds in a med pan on med heat until just fragrant. Combine the sauce ingredients in a large bowl, stir well to blend. If there's already extra water in the bowl from the green onions or other, you may not need the 1/4c water. So add it last, after checking the consistency of your sauce. You want "thin-ish" but not too thin, otherwise it will lack flavour. Check for flavour, if the flavour is strong and salty, its good! (Because it will be diluted with the addition of the noodles, and the water they will add). Add noodles and sesame seeds, mix well, top with green onions. Go recipeless if you wish, and add shredded carrot, celery, cucumber, or fresh coriander, etc. Serve with a green salad, if desired.

Peach Yogurt Cake with Fruit Glacé


Heart-shaped yogurt cake. Literally bleeding with delicious goodness.
It was my birthday today, so in the Recipeless kitchen, that can only mean one thing... it's cake time. Time to make a cake. I can't remember the last time I ever tried to make a cake from scratch... never, maybe? I did okay with the muffins, so I looked at the cake thing as just being "one large muffin". And indeed, the way it puffed up in the oven, it kind of looked like one large heart-shaped muffin (I threw in too much yogurt, but don't worry, I adjusted the measurements for you!). Why heart-shaped? Well why not? (And also because I couldn't find what happened to my regular cake pans).

This all started because I had some fruit flavored yogurt in the fridge that I needed to polish off, and it was way too much to finish at once. So why not use it in a cake? The problem with many cakes is that they are too dry. No problem with that here, I assure  you. This cake is so moist, that my associate taster likened it to cheesecake. And indeed, it did resemble cheesecake. The beauty of it, is that it still leaves much room for variation; making it near-recipeless.

For example, I used a peach yogurt, but you can start with plain yogurt, and add whatever fruit you like. If you have berries, you can even just sprinkle them on top of the batter, for a fruity topping. For the glacé (glaze topping), while it looks like strawberry in the pic, it's actually blueberry. Though I might have preferred peach or even a citrus jam or marmalade, it's what I happened to have on hand, in a jam. So you could use whatever jam or jelly you prefer, for the glaze. No matter how  you vary the basic recipe, it still remains, like most of the Recipeless Cook recipes, quite easy to make. Even if you've never made a cake before. Now let's get started!...


Ingredients

2 eggs, lightly beaten (or at least idly threatened)
3/4 to 1 c yogurt (plain or fruity)
1 c sugar
1/4 c neutral-flavored healthy vegetable oil (ie. good canola) (Substitution: melted butter or margarine)
1 1/2 c all purpose flour
2 t baking powder

Glacé (topping)

1/4 c jam or jelly
1 T lemon juice
1 T sugar


Instructions

Cake

Mixing the liquid ingredients
In a large mixing bowl, add the yogurt and sugar, and mix until combined. Add the beaten eggs, and stir into the mix.
Popping the batter-filled pan
in the oven
Add the flour, and next the baking soda. Mix with a spatula, scraping around the edges of the bowl, until you have just combined the flour into the liquid ingredients. Ensuring that no patches of flour remain. Add the oil, and continue mixing with the spatula, until all is combined and cohesive. Pour the mix into a cake pan, greased with margarine, butter or oil. Bake in a 350F oven. 
From batter to (finally) cake. Success!
Check for doneness, at about 30 minutes. (n.b. The exact time depends, in part, on how much yogurt you used, and the size of your cake pan. As I originally used 1 1/4c yogurt, my cooking time was at least 45-50 min. I estimate the above measurements to take about 30-35 minutes). Use a toothpick in the centre to test for doneness (cake is done when the toothpick comes out clean, and the edges spring back when poked).

From puffy cake to grilled cake
Allow the cake to cool in its pan on a wire rack for at least 15-20 minutes. Then, to prevent a soggy bottom, carefully remove from the cake pan and let it finish cooling on the wire rack, another 15-20 min. n.b. I used an aluminum cake pan, margarine, and no parchment paper. I did not have a problem releasing the cake from the pan. But I did use a blunt dinner knife gently, around the sides of the pan, to help it release from the pan.

Underside of cake during cooling.
After separating it from the side, I inverted the cake over a wire rack (pictured). Because this meant the top of the cake was facing the rack, the rack burned "grill marks" into the soft, hot cake. No problem, that just adds character! If I wanted to prevent this, I'd take a plate, or non-stick cookie sheet, place it over the bottom of the cake, flip the entire thing right-side up, then carefully slide the cake back on to the cooling rack.


Glacé (topping)

Spoon the jam or jelly into a small glass or ceramic mixing bowl. Add sugar and lemon juice and mix well. Then heat up until the sauce has reduced to desired consistency (fairly thick, if you want it to adhere well to the top of the cake. But not too thick, if you want it to drip down the sides, as pictured). You can heat this up by either placing the bowl in a microwave oven for a couple of minutes (as I did), or, better results can be obtained by heating it in a small saucepan over the stove top. You have more control here over the desired consistency, and it takes about the same amount of time.

Dal Shorva (Indian Lentil Soup)


Dal Shorva in bone china.

This is a much simpler, down to earth variation of dal (Indian lentil) soup, than featured here. My version of the recipe from Mumtaz Khan, of "Mumtaz Paan House" restaurant, in Bradford, UK. Though simpler, I consider this a more authentic example of dal, taste-wise. I do not include pressure cooker instructions here. I feel that because of the minimal ingredients, for this to be worthwhile, it really requires slow cooking. There's no substitute for developing flavours than time. Apart from not needing to own a pressure cooker, the upside is that you won't have to deal with messy splatters of lentil all over the place, because of the slow pace it cooks at. The downside is that you take all afternoon to cook the soup. So, done properly, this isn't the best choice for a quick meal from scratch, after returning from work. (Though it does freeze wonderfully, and you can heat it up in minutes).

The lentils soften very slowly over a period of hours. Because of that and the absence of vegetables, there is also no need to own a hand blender, as there's no need to liquify the soup at the end of cooking. Most of the lentils will have melted into the liquid, and the few remaining will add body and character. There is also no need to add salt if you use powdered stock, and no need to add fat by way of oil or butter, if you opt out of the "tarka". So it becomes a pretty healthy choice of soup. I've also not included any hot stuff, to keep it down-to-earth. Of course, if you like your dal piquante, there's no shortage of options. Add fresh chopped chilis, chili powder, curry powder, or even a few teaspoons of Moroccan harissa paste. This is pretty much a "recipeless" recipe, as you can play with the spices and the types of lentils or stock, or if you prefer, add additional chopped vegetables or not.

Ingredients

2 cups mixed lentils, split or whole (Substitute: yellow or red split lentils. Green is not ideal)
8 c water (or chicken or vegetable stock)
2 1/2 T (8t) chicken or vegetable bouillon powder (if using plain water)
1 to 2 cloves garlic (or to taste)
1 tsp turmeric
1 tsp cumin powder
1/4 tsp ground cardamom
1 t garam masala
1 t black pepper, ground
1 t salt (unless using prepared powdered stock, which already has salt in it)
a few bay leaves
1 lemon

Tarka Dal (Optional):

1 lg onion, sliced
3 T oil, butter or ghee
1 T mustard or cumin seed

Instructions

Rinse the lentils in cold water, a few washes until the water is clear. Mince the garlic (shown here). In a large stock or soup pot, add the 8c cold water, the lentils, the garlic and all the spices and herbs to be added (**Do not add the masala right away, if opting to add the tarka at the end). Bring to a boil, then reduce the heat to low, and keep the pot covered, while you let the soup simmer. During cooking, the soup should be just barely moving. Very occasionally, you will need to adjust the heat to maintain this very slow simmer, and to stir the pot to keep the lentils from sticking too much to the bottom. Let the soup cook all afternoon, or at least a few hours (about 6 hours should be good). (Tip: You can probably make it in the morning before going to work, leaving it on this very low heat, and it will be ready 8 hours later).

The longer it cooks, the more the flavours develop. Do not allow it to become too thick (e.g. not thick like porridge). Once done, remove the bay leaves before serving. Slice the lemon, and with a knife, cut away the peel and pith from the slices, leaving only the flesh. Place the lemon slices in the soup bowls, before pouring the soup. Serve the dal with bread and fresh vegetables.

Tarka Dal: Optionally, you can add a "tarka" to the dal at the end of cooking, to enhance flavours. This is done by frying about a tablespoon of mustard or cumin seed in a pan in about three tablespoons of olive oil, butter or ghee on medium heat, until they start to pop and/or become fragrant. Then add sliced onion and fry until softened and translucent (but not browned). Then add the garam masala, fry for one minute, and transfer the mix to the dal soup pot. (Add some dal to the frying pan to ensure all the oil has been transferred). Simmer for a few minutes longer.

Easy Polenta Cake


Polenta appears to be somewhat under-appreciated outside of Northern Italy. Where it is more beloved than Italy's famous affinity with pasta. It is the European cousin to southern America's "hominy grits", but for Italy, may pre-date pasta, pizza and even yeast bread. In fact, in an earlier form, it was consumed by the Roman army during Roman times. At its heart, polenta is good, honest peasant food, and was a staple for centuries among Italy's peasantry. Where they traditionally made it in a copper cauldron, burning over a wood fire, and stirring the polenta with a thick wooden stick (as many still do). Now that's rustic!

Fortunately, at The Recipeless Cook, you don't have to slave over a hot cauldron, stirring like a mad witch for 60 minutes straight. With modern methods in your employ, you can have a delicious polenta meal in... oh about 12 minutes with... just about no stirring. Sound interesting? Well read on!


Ingredients

1 cup coarse yellow cornmeal (aka "corn grits" aka "polenta")
3 to 4 cups water (or chicken stock, or milk)
1/3 to 1/2 lb. grated cheese (and / or powdered cheese)
500 ml. approx tomato-based pasta (aka "spaghetti") sauce, or tomato sauce
Vegetables (or meat) of your choice
Salt
White pepper (optional)

Instructions

Making the Filling 

Bottom layer of polenta,
second layer tomato sauce
third (top) layer vegetables
This dish is a simple layered polenta, with a filling of vegetables (or even meat, if you wish). The idea is to sauté the vegetables seperately, then layer them in the dish. Traditionally, with polenta you might marry it with steamed spinach, kale, fresh basil or other greens, tomatoes, zucchini, asparagus, mushrooms or other typical "summer" vegetables. But I say throw in whatever vegetables you have or desire (other than potatoes or similar root vegetables, which don't combine well with cornmeal). I happened to have brocolli, carrots, and green bell pepper on hand; so I used that.

Start by sauteeing chopped onion in a pan on med, in a bit of olive oil. When softening, turn to med-low. Add garlic, soften. Add your desired vegetables (either one at a time, so as not to overcrowd the pan, or all at once, if you plan on steaming them somewhat). Cook until vegetables are tender-crisp (brightly coloured), or to your desired consistency.

Cooking the Polenta

Top layer of polenta after spreading out
Polenta poured over top
of vegetables
I offer several ways to cook polenta, because variety is the spice of life, after all. The microwave method, which I admit is new for me, is a good compromise between less work and decent texture. It is the "easy" in the title "Easy Polenta Cake". The stovetop pot method is closer to a traditional way of making it, and may provide better results. I believe all methods create somewhat different results, and whichever you choose, depends on what your priorities are. (n.b. For added flavour, you can substitute chicken broth for water (omitting the additional salt), or milk, or cream, or add white pepper. At the end of cooking, you can also if desired, add a bit of butter, or grated or powdered cheese (ie. romano, pecarino, parmesan).


Conventional pot: 

Easy (nearly no-stir) method: In a med saucepan, boil 4 cups of water and a teaspoon of salt (always add salt to a pot after water is boiling). Then slowly whisk in 1 cup of polenta (cornmeal), with a whisk or wooden spoon. Turn heat to low or med-low (depending on your stovetop), and simmer covered. Stir with a wooden spoon every ten minutes or so, for about a minute, until the polenta is stiff enough to hold the spoon upright (about 45 minutes).

Traditional method: In a med saucepan, boil 4 cups of water and a teaspoon of salt (always add salt to a pot after water is boiling). Then slowly whisk in 1 cup of polenta (cornmeal), with a whisk or wooden spoon. Lower the heat to medium and cook, stirring frequently, for about 10 minutes. Polenta is done when the texture is smooth and can hold a spoon upright. If not fully cooked, add additional water and continue to cook.

Microwave:

Cornmeal polenta,
after cooking using
microwave method
In a microwave safe bowl, add 3 1/2 cups of water with 1 cup of cornmeal, and a teaspoon of salt. Microwave on high for six minutes. Stir, microwave for another 6 to 10 minutes, until the polenta is thick enough to hold a fork upright.

Pressure cooker:

You can also cook polenta in a pressure cooker, if you don't have a microwave oven. You won't save time, but like with the microwave, there's little work involved (though more work cleaning up, later). Boil 4 cups of water in the cooker (with the lid off), stir in 1 cup of polenta (cornmeal) with 1 teaspoon of salt. (Pour in a little at a time, stirring in one direction only). Lock the lid in place, and bring the cooker to pressure. Reduce heat to med-low, cook 5 minutes, remove from heat and allow the pot to de-pressurize by itself (5 to 10 min.).  

n.b. Note that  you should proceed to the next and final step very quickly after the polenta is cooked, because it hardens quickly.


Baking the Polenta

Completed dish
with cheese and tomato sauce
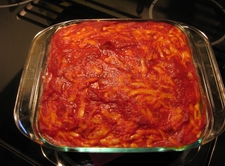
Oil an 8" or 9" square glass (or metal) baking dish with olive oil. Pour in about half of the polenta into the bottom of the baking dish, and mash down with the back of a spoon to spread it evenly across the bottom. Pour in enough spaghetti or tomato sauce to cover the bottom, and spread evently. Pour in your vegetable mixture and spread evenly. Pour in the remaining polenta, patting it down with the back of the spoon, to spread evenly over the vegetables. Decide whether you want to add the cheese next, or the sauce, and then the cheese (according to your preference). If cheese goes next, drop 1/3 to 1/2 pound of grated cheese (e.g. mozarella) in the centre, and spread it out evenly over the surface. Pour on enough tomato sauce to cover the top.

The magic of Chef Boy Hardy
Bake in a 350F degree oven for 15-30 minutes, until the cheese is melted, the sauce is bubbling, and the polenta fairly solid. Cut into squares or rectangles to serve.


Tuna Quesadilla


"One Jeremy Priven special, coming up!"
Tuna. Tuna, tuna, tuna. Toona fortuna. "Toona, es quesadilla?" Just rolls off the tongue, doesn't it? I started making tuna less of an accident and more a regular part of my diet, after looking for a nutritious, low fat alternative to meat. Tuna is a lean protein, contains natural vitamins and minerals, can help lower blood pressure and cholesterol, and contains precious omega-3 fatty acids, that can help lower the risk of heart disease. Among other things. It can be used in a variety of ways, and tuna adds little cost to the meal. So the choice was a no-brainer. But was an unfettered tuna diet literally a no-brainer; ie. a bad idea?

Because after extolling the virtues of my new tuna-friendly diet, someone asked me "Aren't you afraid of all that mercury"? "Mercu-what?" "Mercuree"?? "You mean like the Ford Mercury??". Two minutes of Googling and I could already conclude; "Oh well, it was good while it lasted". Because this too turned out to be too risky to consume regularly. The reason is tuna is a large fish, and has had more time to consume methylmercury in its fatty tissue. (Fresh tuna is even worse, and raw tuna is practically death on a plate).

How DO they get such a big fish
in such a small can? We can thank the
miracle of modern packaging for that.
Some species of canned tuna are worse than others, for mercury levels. Like Yellowfin, Skipjack and Tongol is more likely to contain lower levels of mercury than Albacore. Albacore from the U.S. west coast is said to have far lower mecury levels than found in some other parts of the world. But cans of tuna don't tell you where the albacore came from, and some don't even tell you what species of tuna you're eating. Skipjack (aka "light tuna"), is reported to have the lowest levels of mercury, as it is a smaller species. Most canned tuna sports this variety. Safe consumption levels for adults is about 6oz. (ie. one can) a week. So for me, that just means I have to ease off a bit on the tuna.

Since canned tuna is bland, I wanted a way to spice it up a bit. Although tacos are usually ground meat, they can also contain fish. And if that's true, why not a quesadilla? I often keep flour or corn tortillas in the freezer. So a tuna quesadilla is something that can be made very easily, on the fly, in a jiffy, and a tasty way to enjoy tuna. Here's how that might go....

Instrucciones

Filling


Start preparing a few flour or corn tortillas. (If frozen, warm and soften them up in a microwave oven, on a plate covered with a moist paper towel, for 30 seconds to 1 minute. Depending on how many you have). In a medium non-stick skillet, dump a can of tuna (preferably skipjack variety) packed in oil, including the oil, along with half a chopped onion (optional), and begin to heat on medium. Add about a generous teaspoon (in total) of Mexican/Spanish type spices or seasoning.

Sometimes I like to add Triguisar seasoning (see recipe). It could be one of the Sazon Goya Adobo seasoning mixes, or a fish seasoning, or individual spices/herbs. Such as cumin, turmeric, annato powder, salt, pepper, mexican chili powder, paprika, garlic powder, onion powder, oregano, cayenne pepper; etc. Let the seasoning cook in the tuna/oil for a minute. Pour in a few tablespoons of salsa, and mix well. Continue to cook on med. until the mixture is thickened. Then take off the heat, and add in one half cup of shredded cheese of your choice (cheddar, Monterrey, Mozarella, etc). Mix well until melted.


Tortillas

Place a tortilla on a plate or cutting board, and pour some of this mixture onto the softened tortilla. Not too much, enough to spread across one half of the tortilla. Repeat with more tortillas, until the mixture is used up. (How many tortillas you need, depends on their size). If the tortillas are flour, then fold them in half. If they are corn, then top them with another corn tortilla.

To cook the quesadillas, you can use a lightly oiled grill and grill them like hamburgers. Or the skillet you used to make the mixture.... Clean up your non-stick skillet with a paper towel, and heat a tablespoon or so of vegetable oil in it. Add the folded (and filled) flour tortillas, or the filled corn tortillas. Brown the tortillas on both sides, until moderately browned, and the cheese filling has melted. Cut the flour tortillas in half or thirds. (n.b. The corn tortillas may break apart if you cut them). Serving suggestion: Simple green salad, with a simple lemon or lime dressing.

Yield: 2


Pasta Con La Sarde (Pasta and Sardines In Tomato Sauce)


How to stay healthy during WWIII.
This was a tough one for me. I hate sardines. All my life I've hated sardines. Even though I never tried them. Oh sure, the obvious response is "How do you know whether you like it or not, if you've never tried it?". Well, I've never tried falling off a cliff to see if I would like that, either. It's the "idea" of sardines that gives me the creeps. It, along with tongue, brains, much of fish and shellfish, is "out of my comfort zone". But I did ween my way into eating fish via Ronald McDonald's sanitized fishy-like "Filet-O-Fish" sandwich. Then I graduated from there to sole, halibut, and pollack. Finally, I broke a new "fish barrier" with shrimp (which I'm still kind of grossed about), because try and find a good pad thai at a restaurant without it. Then another barrier was gently ignored, when someone got me to eat scallops. Buttered in pasta. (Just don't show me what they look like in their original form). My last fishy-barrier was broken when I held in the desire to throw up at the thought of eating salmon. Pink just doesn't seem like a good colour for food. Salmon, I admit, is good eatin'. Don't have much of any problem with it today. But sardines? That's another story. There's absolutely nothing in me naturally gravitating toward sardines.


aka Portugese Bacon
I preferred to stick to tuna. It's safe, and it looks like chicken. I don't have to imagine what it originally looks like, since I only eat it from a can. So I don't have a problem with it. That is, until I learned that I'm not supposed to eat tuna very often, because some varieties contain certain levels of mercury. "Mercury" may have a cool name, like planetary cool, but it's actually very not good for you. Enter The Sardine.

I recently read some compelling information about these little buggers, and how healthy they are for you. They are an excellent source of omega-3, B12, selenium, calcium, Vitamin D, and other key nutrients. (Omega-3 & vitamin D are very beneficial, but very difficult to obtain in any natural food sources). On top of which, sardines are one of the cleanest and safest fish to eat. Because of their size and place in the pecking order, there's no real danger of mercury poisoning. Which means they can be eaten far more often than other fish. If that wasn't enough, canned sardines are a lot cheaper than fresh salmon. The only problem with them of course is.... I hate sardines. But I needed to improve my diet, which means I knew they could help me do that.

A lifetime's worth of
exotic gourmet fish dish
for people who don't like fish.
.
So, armed with this new appreciation for sardines, I decided that maybe it was time to experiment. Maybe it was time to actually try sardines, and see if I can live with myself afterward. Maybe it just needs the right recipe, to make me forget I'm eating sardines? So my plan was to make a sardine meal "for people who hate sardines". Preferably a simple recipe, that could be made easily and often. Like pasta. And something with tomato sauce. Because tomato sauce is great for covering up the flavour of everything else in a dish. Since the sardines already came in oil, it seemed natural to fry it up in its own oil, and not add any or take any away. I would say I succeeded in my goal, at least in the opinion of others. Because I served this sardines with pasta in tomato sauce to a couple of friends, who also do not like even the idea of eating sardines. And they had no idea I put sardines in there. Yet they thought the dish was delish.

As for me, well.... I have survived my first and second experiences of eating pan-fried sardines in a heavy sauce. I'm still kind of queasy about it, but I haven't upchucked the nutrients they provided me, so that's good. It may be something of an acquired taste I haven't quite yet acquired. So I bought a bunch of cans of sardines of different flavors, as I intend to persist, and try it in different recipes to see if I will fully shed my aversion to it. And with that delicious introduction, here is today's recipe.... Pasta and Sardines In Tomato Sauce.....

Instructions

In a medium skillet, dump the can of sardines, along with their oil. Cook on med (lower heat a bit if too much splattering occurs), a few minutes until crispy, and browning. (Mash them with a fork, if you don't want to taste large pieces). Add a few cloves of garlic, mashed, minced or sliced. Cook a minute, as they soften. Throw in a few minced shallots if you have them. Add a few sun-dried tomatoes, and/or olives, and/or capers, and/or a few mushrooms. Soften these a bit in th hot oil, and add one can of tomato paste. Mix well, and add water to achieve a medium consistency; or however you prefer your pasta sauce. Add this sauce to your favorite cooked pasta, along with parmesan cheese for topping.


Moroccan Couscous


Little known fact: couscous originated
with a 5 year old named "Billy"
after playing with his vegetables.
Couscous (which is basically tiny pasta), is often associated with Morocco, but is a staple in North and West Africa, and is eaten in numerous parts of the world. There are different varieties of couscous as well. The most popular variety is Moroccan couscous, who's grains are about the size of cornmeal. But Israel for example, is known for its own variation, which has larger grains, about the size of peppercorns. Lebanese couscous has even larger grains, about the size of small peas. In Morocco, the couscous is steamed, and takes a while to cook. But you can now get quick-cooking couscous, that while it may not compare to the more traditional methods, is still good and a breeze to make.

Although there are traditional ingredients associated with couscous, in the ways of The Recipeless Cook, it is best to think of the couscous as the canvas, upon which you draw a meal. The paint in this case, would be the vegetables (or meat) you add to the canvas. The vegetables can be almost anything you have on hand, that needs to be eaten - though couscous recipes traditionally favour winter vegetables. Couscous also often contains dried fruits, which make a delicious contrast to the vegetables. The basic idea behind a couscous meal is simple. Cook the vegetables, as you would a stew (preferably in a stock, in order to have some sauce at the end), then cook the couscous separately, then marry the two together.

In true Recipeless fashion, I've refrained from listing quantities of things, so that you decide what and how much to use, and make it your own. Consider about a quantity of one for each vegetable, and you might try including 3 - 6 different vegetables. (If you've made too much, you can always freeze them, and use them another day for another couscous). The vegetables should be cut chunky size (for taste and tradition), but they can also be halved, and cut in long (ie. 3") lengths.

Ingredients

Vegetable Suggestions: Potato, sweet potato, rutabaga, pumpkin, onion, zucchini, bell peppers, carrot, celery, green beans (cut), squash, yams, bitter melon, etc.

Legume Suggestions: Chick peas, fava beans, kidney beans (large), black beans

Meat Suggestions: Beef, chicken, lamb

Spice suggestions: Cumin, ginger (powder or fresh), fresh garlic, paprika, cayenne pepper, cinammon, nutmeg, salt, harissa (sparingly! the stuff is hot!)

Fruit & Nut suggestions: Pine nuts, walnuts, almonds, raisins, dates, dried apricot, dried fig, lemon slices


Instructions

Simple instructions:

Cook the vegetables (and fruit if using) in chicken, beef or vegetable stock, until fork tender. Cook legumes (if using) and add to vegetables. Cook couscous. Pour vegetables/fruit/legumes over a plate of couscous.


Detailed instructions:

Couscous:

In a sauce pan, pour in one part couscous with one equal part of water. (Optionally: Add 1/2t salt. You can also substitute stock for the water, or otherwise flavor the water). Bring to a boil. When it begins to boil, turn off the heat. Cover and let the couscous sit for about 5-15 minutes. Remove lid, fluff the couscous with a fork. The grains should be light and fluffy.

Conventional pot:

Sauté the aromatic vegetables (ie. onion, garlic, bell peppers) in olive oil for a few minutes. Add the harder vegetables (ie. carrots, celery, potatoes, etc) or meat, and add the water (or flavored stock) and spices, if using. Add the legumes (beans), if using, a little after this (as they should already be precooked). Simmer covered for a few minutes until the vegetables (and/or meat) are fork tender. (The beans should be soft, but not falling apart). Plate the couscous and pour the vegetable mixture over top.

Pressure cooker:

In the pressure cooker, add the vegetables, spices, meat, oil (everything but the couscous), and about 2 cups of water. (Alternatively: First lightly brown the onions and garlic in the olive oil, with the lid of the pressure cooker off. Then add the rest of the ingredients to the cooker). Close and lock the lid. Bring cooker up to pressure on high heat, reduce heat just enough to maintain pressure (low or med low) and pressure cook for 3 minutes. Pour your couscous mixture (ie. beans and vegetables) over the couscous and serve hot.

Alternatively: You can cook the couscous in the pressure cooker, and save on clean up. Once the couscous mixture is done, depressurize the cooker, add the uncooked couscous, stir, replace the lid, lock it and cook for another 3 minutes. Then depressurize the pot again, check the couscous for seasoning. (You can add butter, olive oil or harissa at this point, if you wish). Be careful about the timing, because it's very easy to overcook the couscous with this method. (If the couscous does become too soft and gummy, let the whole couscous dish dry out a bit on low heat, with the cooker uncovered).

Classic Bedouin Hummus (Mediterranean Chick Pea Dip)


Food of the chick pea Gods.
I often do hummus (aka "hummous" aka "hommos"), because it's an easy, cheap, and healthy idea for a snack, lunch or supper. Canned hummus often tastes like the can it came in, and besides that, there's a world of difference from freshly made. But there are a lot of hummus recipes floating around, and I almost feel like I've done them all, in my efforts to replicate the store-bought hummus made by my local Lebanese grocer. Some of the reasons why the store or restaurant bought version might be smoother than what you create at home, may be because they are starting with dried beans, removing the skins with a food mill, and possibly using lots of oil (which adds lots of calories).

I feel a good hummus should be smooth, and that you're just able to taste the lemon juice and tahini (aka "tahina"), but can still taste the chick peas (aka "garbanzo beans"). Every ingredient should be balanced, and nothing overpowering. Once you start adding other ingredients to the mix, like paprika or roasted pepper, you're less likely to succeed at this. As for the texture, once mixed, I think it should be about the consistency of creamy cake frosting.

Canned vs. Dried: Most people prefer to go canned, for the convenience and time factor. And you can get very decent results with canned chick peas, if done right. But, there is a difference in texture and flavor with the dried, with the preferred taste coming from the dried variety. The canned type is more likely to retain its skins, and those contribute to a gritty taste and texture, so should be removed. Especially so for the brands that add citric acid (it firms up the bean, but when processed, leaves that grainy texture. Even after much cooking and blending). The dried variety of chick peas can be softened to whatever texture you like or need for your dish. So you can get a flavor from the dried variety that you can't from canned. If that wasn't enough, dried chick peas are nutritionally superior to their canned counterparts, containing about 50% more nutrients. Compared to canned, dried chick peas offer less than half the sodium, while providing far more (twice as much on average) iron, copper, magnesium, phosphors, potassium, zinc, calcium, selenium, niacin, folate, amino acids, and omega-3 fatty acids.

n.b. Canned chick peas vary in their quality, with the higher quality brands being usually better. Generally, the larger and lighter (in color and weight) the canned chick peas are, the better they will taste.


Ingredients

19 oz can chick peas or 3/4 c dried (reserve 1/4 c of the cooking liquid)
1/4 cup (4 T) tahini (sesame seed paste)
3 - 4 T lemon juice, fresh (or juice of 1 good sized lemon)
1/4 t salt

n.b. For a more neutral taste, reduce the tahini, and lemon juice by a tablespoon, or two for an even milder taste. For a bolder taste, use 1/2 cup of tahini instead. I suggest starting with 3T lemon juice. 


Canned Chick Peas:


Removing the skins: The key to smooth, good tasting pro-quality hummus is removing the tough outer skins. They leave a gritty texture that is nearly impossible to process; particularly if using canned chick peas. (Made worse when some brands contain citric acid. Which firms up the texture of the bean, but makes the skin very difficult to come off by itself, even after much cooking and blending). Also, removing the skins can help prevent gas during the digestive process later. If using dried beans cooked well (see instructions), this step should not be necessary.

Once the canned beans have cooked in boiling water, you can pop the skins off each by scooping a handful in one hand, pinch each bean gently between thumb and forefinger of other hand, catching and discarding the skin to one side, and separating the peeled bean to another. Submerging them in a large bowl under water can help this process. Or, rubbing the beans between a towel can help loosen the skins as well.

Preparation: Drain the canned chick peas, reserving 1/2c of the water it was soaking in. Rinse well.

Cooking: Add them to a pot with plenty of water to cover, and boil the canned chick peas for 20 minutes. The skins should float to the top. Remove them with a slotted spoon. The goal is to remove the skins off of all the beans before processing them. If this hasn't happened during the cooking process, rinse the beans under cold water to cool, and remove their skins (described in detail above). (n.b. If you are not removing the skins by hand, then just drain the beans but do not rinse. We want to keep them and their water warm or hot before processing). When the beans are fully prepared, proceed to instructions.

Dried Chick Peas:

Preparation (soaking method): Inspect the beans for pebbles or other debris, and discard if found. Soak them in a large bowl filled with plenty of cold water overnight. (Optional: If you wish to help soften the beans, add 1 Tablespoon baking soda. Note, some believe baking soda dulls the flavour and nutrients). Drain, rinse well under cold water, fill the bowl again with cold water, leave soaking a few more hours. (Total soaking time 10-15 hours). n.b. You can't oversoak, and indeed the longer you do, the more you remove the digestive gases created. Thus, soaking 2-3 days will help here. But you should refresh the soaking water every 12 hours. Rinse well under cold before cooking.

Cooking:

n.b. Use of a pressure cooker allows one to avoid the lengthy soaking process, while the conventional method has its own advantages; .e.g. testing for doneness during the cooking process.

Tip: To save time and energy, you can cook a larger batch of chick peas, and freeze the remaining beans in plastic containers, submerged in their cooking liquid.

Conventional pot: Place chickpeas in a large pot, cover with plenty of water. (Optional: If you wish to add a bit more flavor, you can toss in garlic, bay leaf and onion in the pot. If you wish to help soften the beans, add 1/4t baking soda. Note, some believe baking soda dulls the flavour and nutrients). Cook 1 - 1 1/2 hours, or until the beans are very soft, the skin separates from the bean with a light pinch, and the chickpea is very easily mashed in your mouth or when pressed between two fingers. Remove the peels and foam floating on the surface of the cooking water, during the process. Reserve a quarter cup of cooking water, drain the rest. If possible, keep the chick peas and water warm or hot before processing. Proceed to instructions.

Pressure cooker (including no-soak method): Add the chickpeas to the cooker with water to cover by one or two inches (no more than the fill line or recommended amount), along with 1 teaspoon per cup of beans of any kind cooking oil. Do not add baking soda.  (Optional: If you wish to add a bit more flavor, you can toss in garlic, bay leaf and onion in the cooker). Cooking times will depend. If you are soaking the beans beforehand, then pressure cook for 12-18 minutes (if you release the pressure immediately), but shoot for 12 minutes. Or 9-14 minutes (if you allow the pressure to fall on its own), go for 9 minutes. n.b. I suggest using the longer natural release method, to minimize problems. If you do no soaking beforehand, then pressure cook for 35-55 minutes (closer to 35 if you have an efficient 15psi cooker, as most are, and closer to 55 if it is 12psi or less). Make sure that once your pot has reached pressure, you leave it on a very low heat. Once done, the beans should be very soft, the skin separates from the bean with a light pinch, and the chickpea is very easily mashed in your mouth or when pressed between two fingers. Reserve a quarter cup of cooking water, drain the rest (before draining the water, remove any skins or foam floating on the surface of the water). If possible, keep the chick peas and water warm or hot before processing. Proceed to instructions.

Instructions:

n.b. A blender is the preferred tool here, but use a food processor if you don't have one. (In a pinch, if the chick peas have been cooked enough, you can even use a hand blender).

Blender: Place tahini and lemon juice in blender, and mix until white, frothy and creamy. Then throw in a handful of chick peas in the same blender, and blend until smooth. Repeat this process until all the chick peas have blended, and the mix has thickened and is pale in colour (like a camel....). But not too thick or yellowy in colour. (n.b. If you happen to have cooked the chick peas into a sludgy mush, don't bother with handfuls. Just pour them all in at once. In which case, no additional cooking water should be necessary). If the mix is too thick, to create the desired thickness, leave the blender running as you slowly pour the reserved cooking or can water through the opening in the top, until the desired consistency is reached. Do this slowly, checking often for taste and texture, so as not to thin it down too much. The hummus should be light and airy, but firm enough to scoop up with fresh, untoasted pita (once chilled). If it's too thin it will lack flavour, if it's too thick it will be heavy and pasty. But it should be a bit thinner than desired, as it will firm up later, in the fridge. (n.b. Do not go above approximately half the volume of your blender container. Blend in batches if you're doing more). When done, transfer to your serving bowl (or container), and let chill minimum one hour in the fridge. As an option, reserve a handful of chick peas for use as a garnish.

Food processor: In a separate bowl, blend the tahini, salt and lemon juice by hand, with a spoon. Set aside. Add chickpeas to processor container, let run on high until it becomes a smooth purée, with no grittiness or lumps (if you have cooked the beans enough, there should not be any). Scrape the side if necessary, to incorporate stray purée into the mix. If your chickpeas are not well drained, then you probably don't need any additional water. Otherwise, if the mix is dry, add just enough of the reserved cooking liquid to get them to blend. Let the mix cool before blending with the tahini (to hasten this, you can transfer chickpea purée to a bowl, or let it sit in the refridgerator a bit). Then add it to the tahini mixture and stir well. It should be smooth, pale, and creamy, but not too runny. Transfer this to your serving bowl (or container), and let chill minimum one hour in the fridge. As an option, reserve a handful of chick peas for use as a garnish.


Substitutions: This section should be blank, because Middle Eastern hummus does not have substitutions; or any other flavors than the ingredients I listed. That might be too confining for some. My first attempt to mess with a classic thousand year old recipe was, in the absence of tahini, replacing it with peanut butter. I did that once, and I won't do that a second time. Tahini is an essential ingredient to this, and peanut butter has no business being with chick peas. But if you have to substitute tahini, try sesame oil (or nothing). As a wild departure on all of this, you can substitute black beans for the chick peas. In which case, try lime juice instead of lemon juice.

Garnishes: To respect the deep tradition of Middle Eastern hummus (nearly a religion to some), additional ingredients should be added as garnishes, if at all. But there are many that can be, depending on your tastes. Just pour or sprinkle them over the prepared hummus. If your tastes run towards more traditional garnishes, you can start with extra virgin olive oil, and add anything from paprika (especially moroccan smoky paprika), to pine nuts, fresh coriander (cilantro), fresh parsley, roasted red peppers, black olives, roasted garlic, cumin (preferably toasted), pistachios, even sumac (a tart Lebanese spice), or za'atar (a Lebanese seasoning of lemon-thyme and sesame seed), or a small amount of honey.

If you're bent on completely bypassing traditional procedures, some possibilities are listed here. They can either top the hummus as garnishes, or blended in as additional ingredients in the mix: extra virgin olive oil, fresh finely minced garlic (well crushed), strained (greek-style) yogurt, coarse salt, pepper, jalapeno, cayenne pepper, tabasco sauce, chili sauce, sun-dried tomatoes, pesto, sour cream, canned chipotles in adobo sauce, fresh herbs (basil/dill/chives/lots of cilantro), or avocado.


Serving:

Hummus is pretty versatile. It can become a dip, by serving it in a bowl, alongside baked pita chips, or crudités (ie. carrots/celery sliced in quarter rounds, lengthwise). It can also fill a sandwich. Spread the hummus on a softened pita or tortilla-style wrap, and add whatever you'd like to create your lunch or supper. Tomatoes, alfalfa sprouts, lettuce, cheese, onions, pickled pepperonci peppers, cooked beef or chicken, etc.

To serve it in a traditional manner, spread the hummus on a decorative plate. Coat the back of a spoon with plenty of good extra virgin olive oil, and run the back of the spoon against the outside edge of the hummus, turning the plate as you go to create a moat of sorts. Make a well in the centre, fill with more olive oil. Garnish with fresh parsley or coriander, and you may add a few pine nuts or pistachios around the edge. Finally, place the reserved whole chick peas near the centre, to add another contrasting texture. Optionally, serve with pickles, ripe tomato and raw onion on the side, for dipping. As they might do in Jaffa or Tel Aviv.

Yield: About 1 1/2 cups (400 ml)

 
The Recipeless Cook © 2008 | Créditos: Templates Novo Blogger