Showing posts with label Supper. Show all posts

Easy No-Cook Summer Tomato Sauce


"No tomatoes were harmed during the production of this sauce."


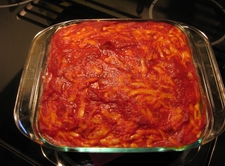
Ahhhh.... it's the summer. Which means heat, humidity, more heat, more humidity, and heat. Who wants to turn the stove on more than necessary, just to make a spaghetti sauce? Well, now you don't have to. You just need access to fresh tomatoes, and a food processor. Choose nice, ripe fresh tomatoes for this one, because you're going to taste it.

Ingredients

tomatoes, as needed (3-5)
herb(s), fresh or dried (ie. basil, chives)
onion, small dice (do not throw in food processor)
garlic, mashed (see instructions here for mashing garlic)
salt, to taste
olive oil, 3-4 T

Directions

Throw the tomatoes in a food processor, along with the mashed/chopped garlic, herbs, salt and olive oil. Process a few seconds, until you have a texture that resembles the above photo. Mix in the onion, and stir your favorite pasta with the sauce.

Done.

Carrot Top Quiche


Ever buy carrots or radishes (or beets), with the tops still on them? And then you throw the leaves out, because you don't have a pet rabbit? Did you know there's tons of nutrients hiding in those leaves? That they're not poisonous? That you can eat them, and have them be good for you? And that they can even taste good, if you know how to make them that way? Yuppers on all of that.

This recipe will show you one delicious way to use your fresh carrots, radishes, beets, etc. to the max, without wasting a bit, and boosting your health to boot. In no way does this quiche taste "healthy", though! Because it's quite delish. Even my four year old grandaughter loved this quiche. And trust me, there ain't nothing and no one pickier in the world than this four year old.

Ingredients

4 eggs
water
1 c flour
salt
sugar
1/4 c good vegetable oil
carrot tops (leaves from one bunch of carrots)
radish leaves (leaves from one or two bunches of radishes or beets, etc)
basil leaves
tomatoes
garlic cloves
paprika
cheese

Pie crust

This one's easy. Mix 1c flour (preferably white pastry) with a pinch of salt and about a teaspoon or two of sugar. Add about 1/4c good quality vegetable or olive oil, mix. Now add just enough cold water to help combine the mixture; only a couple of tablespoons or so. You want a firm and relatively dry mixture, not a mushy wet one. Finally, I like to knead this a bit (inside of a large bowl), ie. a few times, so that it stays together when lining the pie plate.

You can if you wish grease up the pie plate with a tiny bit of oil, but its usually not necessary, given the oil in the crust. You also have the option of rolling the dough out before lining the pie plate with it. But this too is not necessary. You can simply mash the dough against the bottom of the plate (with a closed fist), and smush it out and up the sides. Then finish the crust by pinching around the rim of the pie plate, or flatting it with the tines of a fork. (I prefer the pinch method, as flattening can make the crust difficult to remove from the plate). You can poke holes at the bottom with a small knife or fork if you wish, to prevent air pockets. (If you use organic sifted pastry flour as I did, the dough may be too dense to worry about this).

Cook the pie crust at 375F for about 10-15 minutes, until it is dry. Remove from oven.

Egg Mixture

For the carrot and radish greens, you will need to cook them in advance, to remove bitter flavors.

Carrot Tops: Chop the carrot tops off the carrots, then rinse well (many times) in a bowl/colander of cold water. Finally chop the leaves finely. Chop and mash a large clove of garlic, with salt (see article on how to chop garlic, on this blog). Next, blanche the leaves in a pot of boiling water, with just enough water to cover the leaves by a few centimetres. After the water starts to reduce, add the garlic and a bit of salt and pepper, to taste. Cook until water is nearly evaporated, stirring often.

Radish Leaves: The preparation will be similar to the carrot leaves, but without the blanching stage. n.b. Radish leaves are especially 'sandy', so should be rinsed in several changes of water, ensuring no dirt remains in the bowl of water, when rinsing out. Once rinsed, chop the leaves into pieces, and place the drained but still wet leaves in a heated pan that has olive oil and butter. Fry the leaves on a moderate heat, along with mashed garlic (as described above), adding s&p to taste, until they are cooked down to the consistency of spinach.

Basil leaves: I added some fresh basil to my quiche, as well, to compliment the tomatoes. You only need to rinse and chop the basil, before adding to the egg mixture.

Tomatoes: These just need to be sliced.


Combining the mixture: Beat the 4 eggs in a large bowl until combined, add about 1/4t - 1/2t salt (depending on how much salt you added to the carrot and radish leaves). Add the fresh basil and sauteed carrot and radish leaves (and optionally, add some more salted mashed garlic, as I did). Add a bit of water to bring the liquid mixture to just about or just above 4 cups of liquid (beat the mixture again, after adding the water). Pour the liquid mixture into the pre-baked pie crust, until it is just below the rim. Use a fork to spread the greens around, distributing them evenly. Top with numerous (thin) slices of fresh tomato, until the top is covered with tomato slices. Top that with enough grated cheese to completely cover the top of the quiche (about 1 1/2" from a 400g block of cheese, or 1/2c - 1c). Top that with a generous sprinkling of paprika, across the top of the quiche.

Bake at 375F for about 40 minutes. (Check with a toothpick in the centre, to see if it comes out cleanly).


Cast Iron Pizza


"One broccoli volcano with lava cheese coming up!"

What if I told you that "you could have anything in the world"? And what if I told you "so long as that thing is pizza"? What kind of pizza would it be? Gourmet pizzeria pizza from a restaurant that serves wood fired-pizza perhaps? What if I told you that you could make something like that at home? In under 3 minutes? Impossible, right? Well, in the kitchens of The Recipeless Cook... nothing is impossible!

This recipe is to pizza what the no-knead recipe is to bread. Not just a revelation, but a revolution. Using no special tools other than a vessel that was invented hundreds of years ago: a cast iron pan. You don't need a pizza peel, you don't need a pizza stone, you don't need a wood-oven, you don't need a Kitchenaid mixer... have you got a bowl, a spoon, a 12" cast iron pan and pizza ingredients? Then you're good to go, mister. Get ready for the revolution, we're gonna make making pizza exciting again!....

Ingredients

Dough

1 1/4 teaspoons yeast
1 cup water (warm)
1 1/2 teaspoons salt
2 teaspoons sugar
2 1/2 cups all purpose flour

Topping

pizza sauce
cheese
etc.

CRUST: 

RISE: Mix all the dry ingredients for the dough in a large bowl, add the warm water, and mix with a spoon until combined. You can olive oil to the dough and/or inside of the bowl to help the rise. Cover the bowl and let the dough rise in a warm place for about an hour, until approximately doubled in size.

PREPARATION:  Punch the dough down, and flour a work board so the dough does not stick to it while you are working on it. You will be forming the dough roughly the diameter of the interior of your cast iron pan. Start by rolling it into a ball. (If the dough does not form into a smooth ball but shows cracks, you can smooth things out by kneading the dough a bit. Using the palm of your hand, mash and stretch the edge of the dough against the work surface, fold it back in, give the dough ball a quarter turn, and repeat the process until the dough is smooth enough to stretch into a pizza round).

To stretch it into a pizza round, start by pinching the edges and pulling them out (being careful not to stretch the center too much). This process goes faster if you hold the dough in mid-air by the edges, then turn it rapidly so that gravity causes the dough to stretch farther out. But once you have started to increase the size of the round, you should complete most of the stretching using this traditional method: place the somewhat-stretched dough over your two closed fists. Then give the round of dough a turn, repeating this motion. You can also separate your hands just slightly, to help the dough stretch a bit farther. This process will again cause the edges of the dough round to fall by way of gravity, and the center will stretch out. (Again, take care not to stretch the center too much, to avoid creating holes). You'll be finished when you have stretched the dough out to about or nearly the size of the interior of the pan. WARNING: Read the entire next section before you put the toppings on!

Making pizza dough is easier than it sounds, usually, but if it is not your thing, ok, just go out and buy a pizza dough!
 
TOPPING: I don't like to put too much on pizzas, because the ingredients won't cook properly, and they'll make the pizza too mushy. So put your favorite ingredients, but don't go crazy with that! I consider pizza sauce and cheese, and perhaps olive oil as necessary base ingredients. For the pizza pictured above, I used an usual pizza sauce: roasted red pepper spread (aka vegetable spread).  I like to smear olive oil all over the naked dough before placing the rest of the ingredients. Possibly dried herbs as well. Then the pizza sauce, then the vegetables, then a generous amount of cheese (the pizza pictured is swiss cheese and broccoli).

You are now ready to dress your pizza. But do not add any "hard" ingredients yet. You can start with the base of pizza sauce, oil, herbs (as shown in the picture). But you should wait until the pizza is in the pan before you add the rest of the ingredients. If you add everything at once, then when you try to put the pizza into the pan, everything will roll off and create a big mess! So get the rest of the ingredients completely ready and be prepared to add them very quickly! Timing is very important in this recipe!

COOKING

The blob that ate San Francisco,
when it was only 6 1/2 months old.
Heat the cast iron pan (dry) on your biggest stovetop round at medium high heat. (Placing the palm of your hand a couple of inches above the pan to feel the heat will let you know when it is ready). While you are waiting for the pan to heat up, turn the broiler on (high), making sure the oven rack is in the top position ( a few inches below the broiler element). Now you will need a way to slide the pizza into the pan. You can use a wooden, glass or plastic cutting board (as I did, shown), the back of a jelly roll pan or similar, or if you have it of course, a wooden pizza peel. Whichever tool you use, make sure the surface is well floured, to make the pizza easier to slide. Remember the pan will be hot, so you must not touch it! Now slide the pizza dough into the pan by shaking the board it is on over the pan. If the edges fold after it enters, you can leave it as is or try to flip them back over. To avoid burning the bottom of the pizza, remove the pan from the heat and place it on a heatproof trivet. Then working quickly, toss in the rest of the ingredients you made for your pizza, and top it off with cheese. Then quickly place it under the broiler. Now the fun begins!

Leave it under the broiler for one minute, turn the pan 180 degrees, and let it cook for another minute, watching carefully. Take it out and have a look. It will be done just as it is starting to turn dark brown, and/or slightly scorched (black) in places. Be careful to use oven mitts to remove the pan from the oven, and then remove the pizza from the pan with a metal spatula. Cut and enjoy!


Végé-pâté Supreme


"It's a cake for vegetarians!"

This is my third végé-pâté (aka "veggie paté") spread recipe. It's the latest and greatest, and the last. Of the three, it is closest to the "Classic Végé-pâté" recipe found on this blog. But it's a bit more ambitious than the other two, so after you've tried the "Classic Végé-pâté" recipe, this is a good one to move on to. Although a bit more laborious, it's an attempt to make a vege-paté of perfect taste and texture. Light, smooth, creamy and flavourful, reminiscent of liver paté, and comparable to store bought versions. It's the one you'll want, if you could only choose one...

Ingredients

    1 1/2 c raw unsalted sunflower seeds, soaked in water
    3/4 c ground flax seed (substitute: whole wheat or spelt flour)
    3/4 c nutritional yeast (I used redstar yeast flakes)
    1/2 t sea salt
    1/2 c vegetable oil (I used cold-pressed sunflower oil)
    1 lemon, juice of
    1 potato, peeled and chopped
    1 large carrot, peeled and chopped
    1 onion, chopped
    1 stalk celery, chopped
    1 clove garlic, peeled and mashed
    1/4 c tamari (substitute: soy sauce)
    1/2 teaspoon dried thyme
    1/2 teaspoon dried basil leaves
    1/2 teaspoon dried sage
    1/2 teaspoon dried savory
    1/2 teaspoon ground black pepper
    1/2 teaspoon ground basil
    1/2 teaspoon oregano
    1/2 teaspoon ground dry mustard (substitute: wet)

Sunflower seed paste
Sunflower seed mixture
(added yeast, spices, etc.)
Instructions:

Soak the sunflower seeds in cold water overnight if possible, otherwise soak for however long possible. Drain and transfer to bowl of a food processor, with a bit of water - enough to make a wet-ish paste when the seeds are chopped up by the processor. Process until you are able to achieve a relatively smooth, creamy, fairly thick paste. 

Végé-pâté mixture
(fully combined, ready 2 bake)
Toss in the nutritional yeast, ground flax seed (you can substitute flour if you don't have or won't get flax), and all the herbs, mustard and salt. Process until these are mixed, then remove the mixture from the bowl. Throw in the chopped onions, garlic and tamari sauce, and process until liquified (add a bit of water if necessary). Throw in the vegetables, oil and lemon juice. Process further until it is all homogenous and liquified; about a minute or so. Combine this vegetable mixture by hand with the sunflower seed mixture you set aside. Mix well until both mixtures are fully combined. The resulting mixture should be wet-ish and fairly thick. If it's overly dry, slowly mix in some water. 

Végé-pâté spread fully baked
Grease a 7" x 11" x 2" baking pan with olive oil. Pour in the combined mixture. Bake at 350F degrees in the middle or high rack of your oven, for about 55 minutes, until top is dry, brown and the edges are dark brown and crispy. Check that a toothpick in the center comes out clean. Let cool, cut in equal pieces and keep in refrigerator.


Bánh mì (Vietnamese Fried Egg Sandwich)


"Eat quick, before more vegetables escape!"

The bánh mì (pronounced "bun me!") sandwich is Viet Nam's answer to the Subway chain. Actually, it dates back to the 40's, and the influence of Viet Nam's French colonialists, among others, is clearly seen in this dish. The sandwich can be found in hawker stalls all over the streets of Viet Nam. It's popularity has seen it spread to Western countries as well, who often don't make it to code. The bánh mì  is normally a meat-filled sandwich, and the meat usually revolves around twenty thousand variations of pork. I'm porky enough as it is, so I'm not about to pork things up any further. This variation, with eggs, would be more considered a breakfast bánh mì. But unless you're planning on plowing the fields yourself because the ox have taken ill, this would be considered a pretty heavy breakfast. I made it for supper, instead.

Another way I did not follow tradition, is by using an Italian ciabatta bread for the base. It is chewy and flavorful, with a soft crust. The opposite of a vietnamese baguette, which is drier and has a thin crispy crust. I did so because it had simple ingredients, without the usual fillers and junk the local French versions carry. To more closely follow the bánh mì, you'll want a nice, large, short, fat, French baguette. Which more closely resembles the Viet Namese baguette. (The viet namese baguette is actually made of a combination of rice and wheat flours, and may or may not be found at asian shops in your area). 


Ingredients

crusty (ie. French) bread (short baguette)
2 eggs
carrots
celery
cucumber
coriander (cilantro), fresh (not chopped)
mayonnaise
salt, pepper

Vinaigrette

soy sauce (or Maggi sauce)
rice vinegar
sesame oil
chili oil

Julienne (or shred) the vegetables. Toss the vegetables in a large bowl, and sprinkle over top with the various vinaigrette ingredients (in the quantities you desire for each ingredient). Mix.  In a non stick pan, fry the eggs sunny side up until they are crisp around the edges (I prefer to turn them over at the end of cooking and fry a minute or two, to set the yolk). (n.b. You can add onions here, if you like. Also, I sprinkled my eggs with a bit of soy sauce and sesame oil). Remove. Cut the baguette in half (ensuring you do not cut too close to the bottom). Spread mayonnaise on the bottom half. Then the vegetables, then eggs, top with cilantro. Season with salt and pepper, if desired.

"Waiter! More napkins please!"
Vary the vegetables, if you like. Green peppers can be added, or more exotic ingredients like daikon or jikama, if you can find it (or store purchased pickled vegetables). The eggs can be scrambled or omelet-style if you prefer.  They can be substituted entirely for fried tofu or seitan. The acid can be red wine vinegar, if you don't have rice vinegar, or prefer otherwise. The soy sauce can be Maggi-brand sauce. I used chili oil, because that's all I had that would work. But the hot stuff can be anything hot (particularly asian) that can be mixed or better still, spread on the bun. Sriracha or garlic-chili sauce would work well, for example. You can also add in some cold rice vermicelli noodles. Finally, you can drizzle the vinaigrette ingredients on the bun directly, as many "banh miers" do, instead of mixing it with the vegetables.

The one thing I would maintain is the coriander. Without the fresh coriander, it's just a submarine sandwich!

Fast And Easy Chicken Biryani


Chicken Biryani is India's answer to the Spanish paella. It is a traditional Indian dish of one part rice and parts meat, vegetable and or fruit and nuts; often made before a wedding, and cooked in an oven. Made well, it is truly a stunning feast of a dish. This recipe is nothing like that. This simple stovetop variation does not try to follow tradition, or make a grand affair out of the meal. This one's only about getting a tasty supper on the table, lickety split. For me, the entire dish, from concept to plating, took about an hour. One half hour to soak the rice (meanwhile, the chicken marinade was being prepared), and about a half hour to cook. Plus, it's (almost) a one-pot dinner. At the end, you get a tasty biryani dish with fluffy, separate grains of tinted rice, and moist, flavorful, tender pieces of chicken and onion. How can you not love that? Most biryani recipes call for a gazillion different spices. I cheated and just used a commercial paste


Ingredients

1 c basmati rice
about half a pound or more chicken breast, fresh or frozen (or alternative)
plain yogurt
1 or more onions
A few tablespoons of ghee, butter or olive oil
biryani spice mix (or alternative)
ginger-garlic paste (or fresh garlic & ginger)
saffron (optional)
bay leaf (optional)
turmeric (optional)


Instructions
 

Soak the basmati rice in a large bowl of cold water for half an hour (after which, you drain and rinse it a few times under cold water, until the water is clear). While it's soaking, you can prepare the rest. I used a couple of small frozen chicken breasts for this dish, which I thawed out in the microwave oven. This little convenience really helped in getting a biryani on the table in about an hour, without preparing anything in advance. If you have fresh chicken breast on hand, even better. If you want to get fancier, and use other cuts of chicken (bone in or boneless), or even other cuts of meat (ie. beef), you can do that also. But you may need to alter the cooking times, or the method. Make sure the pieces are cut not too large.

While the rice is soaking, defrost and rinse the chicken breast if necessary, and cut into about 1" cubes. Toss the cubes into a bowl, along with a few tablespoons of plain natural yogurt, about 1 teaspoon to 1 tablespoon of ginger-garlic paste (I used 1 tablespoon), and spices. I recommend a commercial spice paste, such as a biryani or curry paste from "Patak's" or "Mother's". You may need some salt, depending on what you use for spice. I used about a tablespoon of "Mother's" biryani paste, which is a salty spice paste. So no additional salt was needed. (Taste your paste to see how salty it is. Remember it will be diluted by the yogurt, so its okay if its very salty).

 If you don't have or don't wish to get a paste, you can also get a pre-made commercial biryani spice mix in powder form, such as from "Shan" (which comes in a box). If these aren't available to you, use a curry powder. You can also opt to throw in a few additional Indian spices, if you have them on hand. For example, I added about a teaspoon of turmeric powder to my chicken mixture, a bay leaf, and some dried mint.  Other spices to add here may be; cinammon, ground cardamom, black pepper, chili powder, or cloves (remember to remove them later!). Keep in mind the various heat and spice levels, relative to the amount of meat and yogurt you are using, if you are adding spices in addition to a spice paste or powder mix. You may not wish to have it too spicy or too hot. If you have some on hand, you might also try adding a half or full small can of tomato paste to the mixture. Or even a fresh, chopped tomato.

Chop the onion in med. size chunks, and add to the bowl, along with the chicken, yogurt, spices and herbs, if using. Cover your bowl and let this marinade in the fridge, while the rice is soaking. Of course the longer it marinades, the better the flavour. But as this is the speedy version, I only let it marinade until the rice had finished soaking, about 20 minutes. Bring a medium pot of water to boil, large enough to contain the rice. Once boiling, add about a tablespoon of salt and some olive oil to the water. When the rice has finished soaking, drain it and add it to the pot of boiling water. Boil the rice until it is half cooked; about 5 minutes (test it by crushing a grain between your fingers. It should mush down, without being completely mushy, and should leave a harder core).

While the rice is cooking, you can start the chicken. Place a medium sized pot, preferably a medium dutch oven, on medium-high heat. To which, add a tablespoon or two of (in order of preference); ghee, butter or olive oil. (n.b. You can clarify butter to obtain ghee. Just heat it on low power in the microwave, the milk will separate from the yellow solid. Pour through a strainer, or straight into a jar, to separate and discard the milk part, retaining the yellow part). Once starting to heat, swirl the butter or olive oil until it covers the entire bottom and part of the side of the pot, near the bottom.  At this point, you can add some saffron threads, to give a nice colour and flavour to the meat. Now, add the chicken yogurt mixture that you marinated. (IMO, there is no need to wait until the oil has heated, and you're better off not doing that, to avoid sticking). Flatten down the chicken so it covers the entire bottom. Add the drained rice on top of this, and flatten it down, somewhat.

Optional but preferable, you can add some saffron liquid to the rice. This will flavour and perfume the rice, adding a gorgeous yellow or orange color. To do this, heat about an eigth of a cup of water in the microwave (or use hot tap water). To the water, add some saffron threads, and some olive oil. Mix. Pour in a swirl fashion over top of the rice. Now, cover the pot with a heavy lid. If you do not have a heavy lid, then soak a cotton kitchen tea towel with hot water, drain well, and place this over top of the pot (make sure none of it touces the stove element). Place the cover over, to form a tight seal.

Cook the biryani mixture no more than five minutes total on med. high, just to get things started. Then reduce heat to med. (about 5 or 6 on most stovetop dials). Cook on med about 5-7 minutes. Reduce to low (or about 2 on most stovetop dials), and cook out the remaining time of about 17 minutes on (almost) low.

Serve with a salad, or coleslaw, or some raw cut vegetables. You can garnish with coriander, and serve bread (preferably an Indian bread) alongside.

Cold Sesame Noodles


Here's a perfect meal for around this time of year. Thanks to the good folks that brought you global warming®, we seem to be having a scorcher of a spring, and I'm sure summer will be hell next to the fireplace, in comparison. That's the time when you want to bring out a nice bowl of cold (or warmish) sesame noodles. Very simple and quick to make.

Ingredients


Sauce:
1 T smooth peanut butter
1 T Chinese sesame paste or tahini (or simply another tablespoon of peanut butter)
2 1/2 T sesame oil
1 to 2 T sesame seeds (optional)
2 T soy sauce (preferably mushroom flavoured, but could be Bragg's or anything you prefer)
1/4 c water or chicken stock (optional, add last)
1 to 2 cloves garlic
2 t minced ginger
2 t rice vinegar
1 t sugar
1/4 to 1/2 t asian chili paste (could sub red pepper flakes, tabasco or your favorite hot stuff)
1 bunch green onions, chopped

250g (1/2 lb.) yet-ca mein noodles (a straight asian egg noodle, standard fare for this dish. if not available, could sub soba-type noodles, fettuccini-type rice stick noodles or even spaghetti)

In a large pot of boiling water, boil the yet-ca mein noodles for 7 to 10 minutes. Drain, rinse noodles well under cold water, shake out excess water and spread in colander to help them dry while the rest is being prepared.

While the noodles are cooking, toast the sesame seeds in a med pan on med heat until just fragrant. Combine the sauce ingredients in a large bowl, stir well to blend. If there's already extra water in the bowl from the green onions or other, you may not need the 1/4c water. So add it last, after checking the consistency of your sauce. You want "thin-ish" but not too thin, otherwise it will lack flavour. Check for flavour, if the flavour is strong and salty, its good! (Because it will be diluted with the addition of the noodles, and the water they will add). Add noodles and sesame seeds, mix well, top with green onions. Go recipeless if you wish, and add shredded carrot, celery, cucumber, or fresh coriander, etc. Serve with a green salad, if desired.

Vegan Végé-Pâté


Yes, I have a nice végé-pâté recipe already up. But this one is different. Adapted from a recipe by raw chef Douglas McNish, this is a very tasty vegan alternative to liver paté. As well as to the more common cooked loaf type of vege pate. It's a very basic recipe, requiring few ingredients, no "special" ingredients (ie. nutritional yeast), and absolutely zero cooking time. So you don't even need a stove (but you will need a food processor). You can be relatively flexible too on the ingredients. e.g. Add alfalfa sprouts or spring onions instead of or in addition to the fresh parsley. Or add nuts; ie. almonds or walnuts. Try this spread on fresh pita bread, or use as a stuffing for roasted bell peppers to create a vegetarian supper.

Ingredients

3 cups sunflower seeds
3 ribs of celery, cut in chunks
1 T dill, dried (or 1/4 c fresh)
juice from one lemon
2 T fresh ginger, sliced
3 cloves garlic
2 T tamari sauce (or soya sauce)
1/4 c fresh flat leaf parsley


Instructions

Soak the sunflower seeds in a bowl filled with hot water (about 30 minutes). Meanwhile, add everything to the food processor, except the parsley and sunflower seeds. Process until the vegetables, herbs and spices are finely minced, scraping the sides of the bowl as needed. Add the parsley, and continue to process until finely chopped. Add the sunflower seeds, and process until a smooth paté has formed (close to the consistency of liver paté). This will take at least a few minutes of running time at high speed. Stop the machine occasionally, and scrape the sides of the bowl down with a spatula. Either process in small batches, or try to move the top portion down to the bottom of the bowl, and the bottom up to the top before continuing with the processing, to help ensure the mix is processed evenly. Taste for seasoning when done.

Chinese Chili Chicken


If you don't know, there's a really great hot spicy South Indian chicken dish called "Chicken 65", that uses a long host of ingredients to flavour chicken wings or drumsticks. This has nothing to do with that. It just kind reminds me of that dish.

Tonight I had a half dozen chicken thighs I needed to cook. I had a hankering to try to use them for the Iranian shish kebab recipe here. Then I decided it's too much trouble to debone chicken thighs (two major bones per piece, you need to get rid of). With a million ways to make chicken, deciding how to do it is the hard part. Noticing I had some Chinese chili paste in the fridge, I took a turn down quite a different alley, and wound up here... With a spicy (but not very spicy) number, that I call "Chinese Chili Chicken". Featuring tonight's guest... Chinese chili paste. It can also come as "chili garlic paste", and you can also use the "sweet chili garlic paste" version here. You can find the product in most Asian markets. Or even local grocery stores, in the international foods section. It is a paste made of red chilies, where you can see their white seeds embedded. It's pretty hot by itself, but a marinade/basting sauce will be created with it, diluted with liquids and balanced by a honey sweetness. So it's not as hot as it looks.


Ingredients

6 chicken thighs (or less)

Marinade:

2 heaping T Chinese chili sauce (with or without garlic, regular or sweet)
4 T soy sauce
1 T minced garlic/ginger (optional)
2 T honey
2 T lemon juice
a few green onion, chopped (optional)


Instructions

Prepare the chicken thighs by removing the skin, fat and sinew, rinsing, shaking off water and setting aside. In a large (preferably wide) bowl, combine the marinade ingredients and mix well. You want a syrupy consistency. Not thin, but not thick as molasses either. About that of cough syrup. So if necessary, add a bit of water to achieve this. Dip the chicken pieces in the marinade, turning each over so that both sides have received the marinade, then leave them in the marinade bowl. Cover and refrigerate for a little while. Which can be as short or as long as you wish (the longer the better), to allow the flavors to develop a little. When done, place the chicken pieces on a wire rack, top side up, with a jelly roll pan underneath to catch the drippings. Pour some of the marinade over each piece.

Adjust your oven rack so that it is about 7 - 8" from the broiler element. Turn the broiler on and when heated, broil the pieces for about 25-30 minutes (watching carefully after 20). Turn over a few times during the cooking process, after each side starts to dry out. Baste the underside with the additional liquid during cooking, after it has dried out, to keep things moist. When the liquids have just evaporated, and the chicken pieces are blackened around the edges, the dish is done. To properly check for doneness, insert a thermometer into the thickest part and verify 170F. Serve two pieces per person, with salad and plain rice (or noodles), or your favorites sides.


Classic Végé-pâté


No geese were harmed
during the production of this
vege-pâté.
The idea behind végé-paté, as in many vegetarian dishes, is to mimick a popular meat-based favorite. In this case, liver pâté sandwich spread. Which it does rather nicely, without breaking up families of geese or duck in order to snatch their livers. Végé-pâté may not be a complete protein source, but it is healthy and low-fat, with the rare benefit of nutritional yeast. It is excellent on French baguette, or when spread out on a "wrap" type sandwich (soft thin tortilla), adding such as lettuce, alfalfa sprouts, tomatoes, cucumbers, sweet onion, etc. It can be a light supper, as easily as it can be lunch. Take it with you to work, it's miles beyond food court food.

Ingredients

1 c unsalted sunflower seeds
1/2 c olive oil, (preferably extra virgin)
1/2 c whole wheat flour
1/2 c nutritional yeast (preferably torula yeast)
juice of 1/2 lemon
1 med to large (or 2 small) potato (or 1 sweet potato), peeled and chopped
1 large carrot, peeled (if not organic) and diced
1 onion, chopped (Optional: and/or 2-3 spring onions, sliced)
1 stalk celery, chopped
1 lg. clove garlic, peeled
1/4 c light soy sauce (preferably Bragg's) (Optional. I usually prefer without the soya sauce)


Spices

1/2 t (each) of any/all of the following dried herbs: thyme, savory, dill, basil, sage
1 t fines herbes (optional)
1/2 t salt
1/2 t ground black pepper
1/2 t ground dry mustard (Substitution: 1 t regular mustard)


Instructions

Lightly grease an 8x8 inch baking dish with a bit of the olive oil. Mince the garlic with the flat blade of a knife as demonstrated here. Throw the garlic, onions and/or spring onions into the food processor, blend until finely shredded. Then add the carrots and repeat. Then the potato (repeat). Then the celery. And finally the sunflower seeds. Continue to process until the mix is finely minced. Add the flour, yeast, lemon juice, mustard, salt (unless using soy sauce), herbs and spices. Process for a couple of minutes until everything is smooth and homogenized. The mix should be about the consistency of cake batter. If the mix is too dry, add water, 1/4c at a time, until it forms a heavy liquid batter, and pours slowly (when falling off a spoon). Be careful not to make the mix too wet with liquid. Pour into an 8" x 8" pyrex dish (or metal), bake for 1 hour @ 350F degrees, until lightly browned. Cut into squares.

(Optional: Cover the dish with the vege-paté tightly with aluminum foil, and place it into a larger dish, partially filled with water. Replenish water as needed, if it dries out during cooking. Remove foil cover during the last 15 minutes of  baking). 

Easy Polenta Cake


Polenta appears to be somewhat under-appreciated outside of Northern Italy. Where it is more beloved than Italy's famous affinity with pasta. It is the European cousin to southern America's "hominy grits", but for Italy, may pre-date pasta, pizza and even yeast bread. In fact, in an earlier form, it was consumed by the Roman army during Roman times. At its heart, polenta is good, honest peasant food, and was a staple for centuries among Italy's peasantry. Where they traditionally made it in a copper cauldron, burning over a wood fire, and stirring the polenta with a thick wooden stick (as many still do). Now that's rustic!

Fortunately, at The Recipeless Cook, you don't have to slave over a hot cauldron, stirring like a mad witch for 60 minutes straight. With modern methods in your employ, you can have a delicious polenta meal in... oh about 12 minutes with... just about no stirring. Sound interesting? Well read on!


Ingredients

1 cup coarse yellow cornmeal (aka "corn grits" aka "polenta")
3 to 4 cups water (or chicken stock, or milk)
1/3 to 1/2 lb. grated cheese (and / or powdered cheese)
500 ml. approx tomato-based pasta (aka "spaghetti") sauce, or tomato sauce
Vegetables (or meat) of your choice
Salt
White pepper (optional)

Instructions

Making the Filling 

Bottom layer of polenta,
second layer tomato sauce
third (top) layer vegetables
This dish is a simple layered polenta, with a filling of vegetables (or even meat, if you wish). The idea is to sauté the vegetables seperately, then layer them in the dish. Traditionally, with polenta you might marry it with steamed spinach, kale, fresh basil or other greens, tomatoes, zucchini, asparagus, mushrooms or other typical "summer" vegetables. But I say throw in whatever vegetables you have or desire (other than potatoes or similar root vegetables, which don't combine well with cornmeal). I happened to have brocolli, carrots, and green bell pepper on hand; so I used that.

Start by sauteeing chopped onion in a pan on med, in a bit of olive oil. When softening, turn to med-low. Add garlic, soften. Add your desired vegetables (either one at a time, so as not to overcrowd the pan, or all at once, if you plan on steaming them somewhat). Cook until vegetables are tender-crisp (brightly coloured), or to your desired consistency.

Cooking the Polenta

Top layer of polenta after spreading out
Polenta poured over top
of vegetables
I offer several ways to cook polenta, because variety is the spice of life, after all. The microwave method, which I admit is new for me, is a good compromise between less work and decent texture. It is the "easy" in the title "Easy Polenta Cake". The stovetop pot method is closer to a traditional way of making it, and may provide better results. I believe all methods create somewhat different results, and whichever you choose, depends on what your priorities are. (n.b. For added flavour, you can substitute chicken broth for water (omitting the additional salt), or milk, or cream, or add white pepper. At the end of cooking, you can also if desired, add a bit of butter, or grated or powdered cheese (ie. romano, pecarino, parmesan).


Conventional pot: 

Easy (nearly no-stir) method: In a med saucepan, boil 4 cups of water and a teaspoon of salt (always add salt to a pot after water is boiling). Then slowly whisk in 1 cup of polenta (cornmeal), with a whisk or wooden spoon. Turn heat to low or med-low (depending on your stovetop), and simmer covered. Stir with a wooden spoon every ten minutes or so, for about a minute, until the polenta is stiff enough to hold the spoon upright (about 45 minutes).

Traditional method: In a med saucepan, boil 4 cups of water and a teaspoon of salt (always add salt to a pot after water is boiling). Then slowly whisk in 1 cup of polenta (cornmeal), with a whisk or wooden spoon. Lower the heat to medium and cook, stirring frequently, for about 10 minutes. Polenta is done when the texture is smooth and can hold a spoon upright. If not fully cooked, add additional water and continue to cook.

Microwave:

Cornmeal polenta,
after cooking using
microwave method
In a microwave safe bowl, add 3 1/2 cups of water with 1 cup of cornmeal, and a teaspoon of salt. Microwave on high for six minutes. Stir, microwave for another 6 to 10 minutes, until the polenta is thick enough to hold a fork upright.

Pressure cooker:

You can also cook polenta in a pressure cooker, if you don't have a microwave oven. You won't save time, but like with the microwave, there's little work involved (though more work cleaning up, later). Boil 4 cups of water in the cooker (with the lid off), stir in 1 cup of polenta (cornmeal) with 1 teaspoon of salt. (Pour in a little at a time, stirring in one direction only). Lock the lid in place, and bring the cooker to pressure. Reduce heat to med-low, cook 5 minutes, remove from heat and allow the pot to de-pressurize by itself (5 to 10 min.).  

n.b. Note that  you should proceed to the next and final step very quickly after the polenta is cooked, because it hardens quickly.


Baking the Polenta

Completed dish
with cheese and tomato sauce
Oil an 8" or 9" square glass (or metal) baking dish with olive oil. Pour in about half of the polenta into the bottom of the baking dish, and mash down with the back of a spoon to spread it evenly across the bottom. Pour in enough spaghetti or tomato sauce to cover the bottom, and spread evently. Pour in your vegetable mixture and spread evenly. Pour in the remaining polenta, patting it down with the back of the spoon, to spread evenly over the vegetables. Decide whether you want to add the cheese next, or the sauce, and then the cheese (according to your preference). If cheese goes next, drop 1/3 to 1/2 pound of grated cheese (e.g. mozarella) in the centre, and spread it out evenly over the surface. Pour on enough tomato sauce to cover the top.

The magic of Chef Boy Hardy
Bake in a 350F degree oven for 15-30 minutes, until the cheese is melted, the sauce is bubbling, and the polenta fairly solid. Cut into squares or rectangles to serve.


Bengaloo Chick Pea Curry


Here is an Indian approach to chick peas that really elevates the humble bean to lofty heights. It is typical of Northern fare enjoyed by the Hindu population. Do not be threatened by the amount of ingredients. The recipe is not complex, and leaves much room for variation. Just about all of the ingredients can be maintained as pantry staples. Particularly the Indian spices, if you keep them on hand for such recipes. Which makes this chick pea curry something that you can make just about any time, and in little time (if you opt for canned chick peas).

Ingredients

2 t oil (or "ghee", a clarified butter)
1 onion, chopped
4 cl garlic, minced
1 t tomato paste
1 can chick peas (15oz) (or: 3/4 dried chick peas, cooked), drained, reserve 3T liquid
1 to 2 T lemon juice

Spices

1 t curry powder
1 to 2 t salt
1 t black pepper
1/2 t crushed red pepper (or to taste)
1 t margarine or butter
1 t chili powder
1 t salt
1 t turmeric
1 t paprika
1 t cumin
1 t coriander powder
1 t garam masala powdered spice mix

Instructions

Heat the oil (or ghee) on med-high. Fry the onions until slightly browned. Reduce heat to medium, add garlic, curry powder and tomato paste. Stir, and simmer for 2 minutes. Add chick peas, reserved liquid, lemon juice, salt, pepper and the remaining spices. Simmer 5-6 minutes, stirring occasoinally. Add red peppper flakes, margarine or butter, and stir to melt. Stir, simmering for 5 minutes, or until chick peas are softened and the dish is hot.

Serving 

Serve on rice, and/or with bread and salad.


"When your candles are burning low
 strike a match, and curse the darkness!"


- "Vibrator"
: Sananda Maitreya

Persian Rice with Tahdig Sibzamini


A small paintbrush, a steady hand,
FD&C Yellow #6 food dye, and a few days
 free time is all you need to make this
delicious coloured rice dinner.
I've always found it challenging to cook basmati rice, so that the grains are separate and fluffy, but neither hard, nor over done and mushy. (Parboiled rice is much easier, but does not have the same taste and texture, or "cachet"). From my experiences in an Iranian restaurant, I could see that the Persians solved that problem. I learned that is, in part, because they cook it twice. Once by boiling, then by a long steaming stage. In addition, they might use a lengthy pre-soak (as much as 24 hours), which helps condition the rice.  In general, their seasoning is very subdued, as compared with many recipes in the Indian version of basmati. But there's something to be said for that as well, as humble seasoning practices allow the natural flavour of the foods to remain unhidden. So expect Persian rice to be relatively simple, but perfectly cooked and very tasty all the same.

Tahdig Sibzamini: Although the "tahdig" is optional in Iranian cooking, it's a very good example of rice that is uniquely Iranian. A "tahdig" (aka "Tahdiq", "Tahdeeg", "Tardig") is where a flavored crust is formed on the bottom of the cooking vessel, as a sort of covering for the rice. It might just be saffron water, or, as in the case of tahdig sibzamini ("sibzamini" = "potatoes") potatoes. However, pita bread (cut in triangles) could be used instead. The potato tahdig might be a bit tricky to do at first, without practice. As getting the crust out to brown and not burn, or simply getting it out of the pot in relatively one piece, is not as easy as it sounds. (Ideally, should be dark orange). But it's worth practicing, because it makes for a very special and tasty rice dish. This recipe is here to accompany the chicken kabab recipe.


Ingredients

2 c basmati rice
4 c water
1 potato, large, 1/4" thick slices (optional) (or pita bread, cut in triangles)
1 1/2 t salt
1/2 t saffron, dissolved in 2 T hot water (optional)
1/2 c olive oil (or butter)
1 T yogurt (optional)

Instructions

Wash and clean the rice. (Optionally: pre-soak the rice in 4c water with 1 T salt for 2-24 hours. Drain water. n.b. This helps make the rice less sticky). Fill a large pot (preferably non-stick) with the 4c cold water, add the salt and rice, and boil for 6-10 minutes (until "al denté", slightly firm to the bite), stirring occasionally. Drain and rinse. Return pot to the stovetop, placing heat on med-high, and add 6T of the oil (or butter), along with 1/4c water, 1/4t salt and some of the coloured saffron water and mix well (Optional: Add 1T plain yogurt).

Tahdig (rice crust):  Add about 4T of cooked rice to the pot, and mix well with the liquids.


Tahdig Sibzamini (potato crust): Place the potato slices along the bottom of the pan in a single layer, and allow them to brown a couple of minutes. (Optional: Use pita slices cut in triangles instead of potatoes).

Next, carefully pour the cooked rice on top of this, and move it away from the sides of the pot with a spoon (in order to brown just the bottom). Poke a few holes in the rice with the end of a wooden spoon. Cover pot with a kitchen towel, then with the pot lid, and cook for 10-15 minutes on med-high. Mix the remaining 2T oil to 1/2c hot water (if using butter, you may need to soften it first). Then pour this mixture over the rice, into the holes and around the edges. Turn heat to very low, cover again with the towel and lid, and cook 45-50 minutes.

Remove from heat, let pot cool uncovered for a few minutes (preferably on a wet kitchen towel, which helps release the contents of the pot). To remove the rice and its bottom crust, you can use a spatula to loosen it around the sides, place a serving platter over top of the pot and flip to release the rice. If the potato crust (tardiq) has stuck to the bottom, it can be removed with the spatula. Or you can simply remove the rice, leaving the crust, then remove the crust and serve separately.

Serving

Mix the remaining saffron water with some of the cooked rice to color the grains yellow, and place the yellow grains on top of the rice, for a decorative effect. (You can also sprinkle strands of saffron on the rice for further effect). Serve alongside chicken kababs with a Persian soup.

Yield: 4 -5

Chicken Kabab Koobideh (Iranian Chicken Kebabs)


Genetic modification in the 21st century
provided new and exciting food options.
But some thought crossbreeding a chicken
with a grapefruit was taking things too far.
I thought the Indians made good chicken. And they do. But one of the most memorable chicken dishes I had in recent memory, was at an Iranian restaurant. We ordered and were served "chicken kebab koobideh". Specifically, the chicken version of the more popular beef kebab. It had an orangey colour, and was moist and flavorful throughout. It came with a most delicious Persian rice, whereby some of the grains were coloured orange. The oil from the kebabs infused the rice with a wonderful flavour. And it was the most fluffiest and perfectly cooked rice I'd seen. Hard to imagine it was the same sort of rice served in an Indian restaurant. (Although Persians do have their own varieties of basmati). Served alongside the kebabs was grilled tomatoes, raw onion, parsley, and pita bread.

Iranian pizza is quite different from Italian,
with many unusual ingredients for toppings.
Cutlery, for example. 
Kebabs, now served in many parts of the world, originated in Iran (back when it was "Persia"), and spread throughout from there. So they've been doing this for a long, long time. This dish has been a staple in Iran for much of that time. So you will find it served commonly and frequently in both Iranian homes, and Iranian restaurants abroad; which often specialize in kebabs.

Breakfast in Iran.
The Kebab, its accompanying rice and other Persian dishes I've tasted, have given me a great appreciation for Iranian cuisine. I dare say, it has even challenged Indian for my favorite type of cuisine. In the way it plays with spices and such, it is much simpler than Indian fare. But it can be even tastier, if not healthier. In a truly "less is more" type of way. Plus, I see more of an emphasis here on fresh, raw ingredients. Naturally, after coming back from the last "Persian" restaurant, I was determined to try to recreate the meal I had. Thus, the chicken kebab koobideh recipe here is the first element of that. See my recipes on Persian Rice and Persian Soup for the trifecta. Make no mistake, this is an ambitious recipe. Not a quick and particularly easy recipe (though the ingredient list is simple). But I hope if you try it, it turns out good and worth the effort. If not... look up the nearest kebab house....


Ingredients

Kebabs:

1 lb ground chicken (or chicken breast or leg or thigh)
1 white onion, large, grated
1 pinch saffron, resting in 1 T boiling water
1 T tumeric
1 egg yolk
1 cl garlic, crushed
1 t smoked paprika (optional)
1/2 t salt

Garnish:

roma tomatoes (for grilling)
white onions (for grilling)
raw spanish onion, thick slice (garnish)
fresh parsley (garnish)
flat bread (ie. pita or iranian bread)
1 lemon, quartered (garnish)


Instructions


Grinding the chicken

If you can find ground chicken at your local grocer, then you're lucky. I rarely can. Even so, I think it's better to grind your own, because this way you know what went into it, and can remove all the fat and other undesirables in the meat. (n.b. Authentic chicken koobideh kebab does have fat in it. About an 80/20 ratio, to keep the meat moist during cooking. I prefer to lose this, at the expense of dryness, than claim authenticity). If you have a meat grinder, or a stand mixer with a grinder attachment, you're singing. I don't. (Although it might be the only kitchen gadget I don't have). So in this case, we have to improvise a little. Hello Cuisinart.... Any food processor with a decent motor and sharp blade, should be able to produce a viable result. (Do not use a blender! A food processor is challenging enough. That will be a nightmare).

Breast: Prepare one pound of boneless chicken breast by removing the fat/sinew by scraping with the blade of a knife.

Leg/thigh: Even better flavor can be had using the darker cuts of meat, and indeed, the kebabs we were served at the restaurant was made with chicken thighs. But it's usually more trouble to prepare. If included, remove skin and de-bone, if necessary. Remove all fat/sinew from the meat, by scraping or cutting with the blade of a knife.

Cut the chicken meat into 1" pieces, and partially freeze the cubes by placing them in a zip loc bag (single layer if possible, and storing in freezer for 1 hr. The meat should be fairly firm, but -not solid-. (Partial freezing helps prevent the meat from becoming too sticky during processing). Once done, break the cubes apart, and place them in a single layer in the processor. (Work in multiple batches if necessary).

Hold the machine steady with one hand, while using it on "pulse" (brief bursts of power) with the other. Start slow, and scrape down the sides of the container as needed. Until the meat is well-chopped and cohesive, but not pasty. Transfer meat to a mixing bowl, and repeat with remaining batches if necessary until all the meat is processed. The ground chicken mix should not be too soft and wet, or it will fail to hold its shape during grilling. In a med bowl, beat the egg yolk. Add the grated onion, saffron water, salt and spices. Mix. Then combine this egg mixture with the meat. Either manually (with a spoon in a large bowl) or via the food processor. Refrigerate this mixture overnight (or a few hours), to marinate and allow the flavours to develop.


Grilling

In Iran, the tried and tested formula for the
Burger King "Whopper" was tweaked a
little, for the local market. 
Spread the meat onto the centre of flat metal skewers (preferably wide Iranian shish kebab skewers), such that it is balanced on the skewer, and push it on well so the meat does not fall off. Use the palm of your hands to press the meat in place. You could later gently pinch the meat between your thumb and forefinger, spreading the meat along the skewer, and creating indentations for a nice grilling pattern. Kebab Koobideh is long (about 7-8"), and so normally spread out along the skewer, a couple of inches from either end.

Use your favorite grilling method at a high heat, until nicely charred at the edges. (Could be an indoor or outdoor bbq, or on a rack a few inches under the broiler of your oven). Best results will be over open flame, but there's a great advantage to cooking the kebabs in an oven. As you can catch the juices and pour them over or around your rice. You can add roma tomatoes and white onions (basted in olive oil) to the end of the skewers, or grill separately. Cook until edges are blackened.

Serving

Koobideh kababs are usually served with grilled (blackened) roma tomatoes, raw onion, fresh parsley, Iranian or Lebanese flatbread (often dusted with sumac spice), and cucumber in thick slices, or shredded. Alongside the kebabs are persian rice (yes, I have a recipe for that too...). This is essential, as the juices from the kababs help flavour the rice. If you're really going all out, you can serve this meal with a delicious Persian soup as well.

Cleaning

If using a grinder or food processor, be sure to fully soak and/or wash your grinder/processor parts immediately after in hot soapy water. Otherwise it will be very difficult to clean once the residue has dried. It is advisable to soak the parts in water to which a bit of bleach has been added, to prevent contamination.


Yield: 4

Tuna Quesadilla


"One Jeremy Priven special, coming up!"
Tuna. Tuna, tuna, tuna. Toona fortuna. "Toona, es quesadilla?" Just rolls off the tongue, doesn't it? I started making tuna less of an accident and more a regular part of my diet, after looking for a nutritious, low fat alternative to meat. Tuna is a lean protein, contains natural vitamins and minerals, can help lower blood pressure and cholesterol, and contains precious omega-3 fatty acids, that can help lower the risk of heart disease. Among other things. It can be used in a variety of ways, and tuna adds little cost to the meal. So the choice was a no-brainer. But was an unfettered tuna diet literally a no-brainer; ie. a bad idea?

Because after extolling the virtues of my new tuna-friendly diet, someone asked me "Aren't you afraid of all that mercury"? "Mercu-what?" "Mercuree"?? "You mean like the Ford Mercury??". Two minutes of Googling and I could already conclude; "Oh well, it was good while it lasted". Because this too turned out to be too risky to consume regularly. The reason is tuna is a large fish, and has had more time to consume methylmercury in its fatty tissue. (Fresh tuna is even worse, and raw tuna is practically death on a plate).

How DO they get such a big fish
in such a small can? We can thank the
miracle of modern packaging for that.
Some species of canned tuna are worse than others, for mercury levels. Like Yellowfin, Skipjack and Tongol is more likely to contain lower levels of mercury than Albacore. Albacore from the U.S. west coast is said to have far lower mecury levels than found in some other parts of the world. But cans of tuna don't tell you where the albacore came from, and some don't even tell you what species of tuna you're eating. Skipjack (aka "light tuna"), is reported to have the lowest levels of mercury, as it is a smaller species. Most canned tuna sports this variety. Safe consumption levels for adults is about 6oz. (ie. one can) a week. So for me, that just means I have to ease off a bit on the tuna.

Since canned tuna is bland, I wanted a way to spice it up a bit. Although tacos are usually ground meat, they can also contain fish. And if that's true, why not a quesadilla? I often keep flour or corn tortillas in the freezer. So a tuna quesadilla is something that can be made very easily, on the fly, in a jiffy, and a tasty way to enjoy tuna. Here's how that might go....

Instrucciones

Filling


Start preparing a few flour or corn tortillas. (If frozen, warm and soften them up in a microwave oven, on a plate covered with a moist paper towel, for 30 seconds to 1 minute. Depending on how many you have). In a medium non-stick skillet, dump a can of tuna (preferably skipjack variety) packed in oil, including the oil, along with half a chopped onion (optional), and begin to heat on medium. Add about a generous teaspoon (in total) of Mexican/Spanish type spices or seasoning.

Sometimes I like to add Triguisar seasoning (see recipe). It could be one of the Sazon Goya Adobo seasoning mixes, or a fish seasoning, or individual spices/herbs. Such as cumin, turmeric, annato powder, salt, pepper, mexican chili powder, paprika, garlic powder, onion powder, oregano, cayenne pepper; etc. Let the seasoning cook in the tuna/oil for a minute. Pour in a few tablespoons of salsa, and mix well. Continue to cook on med. until the mixture is thickened. Then take off the heat, and add in one half cup of shredded cheese of your choice (cheddar, Monterrey, Mozarella, etc). Mix well until melted.


Tortillas

Place a tortilla on a plate or cutting board, and pour some of this mixture onto the softened tortilla. Not too much, enough to spread across one half of the tortilla. Repeat with more tortillas, until the mixture is used up. (How many tortillas you need, depends on their size). If the tortillas are flour, then fold them in half. If they are corn, then top them with another corn tortilla.

To cook the quesadillas, you can use a lightly oiled grill and grill them like hamburgers. Or the skillet you used to make the mixture.... Clean up your non-stick skillet with a paper towel, and heat a tablespoon or so of vegetable oil in it. Add the folded (and filled) flour tortillas, or the filled corn tortillas. Brown the tortillas on both sides, until moderately browned, and the cheese filling has melted. Cut the flour tortillas in half or thirds. (n.b. The corn tortillas may break apart if you cut them). Serving suggestion: Simple green salad, with a simple lemon or lime dressing.

Yield: 2


The Recipeless Cook © 2008 | Créditos: Templates Novo Blogger